Install UC
Before initiating the installation of the UC, the following prerequisites need to be completed:
|
Prerequisite |
Instructions |
|
URL of the ObserveID Authentication Provider |
The URL must be requested from the ObserveID team before the installation starts. |
|
OAuth scope for JWT authentication |
For the OAuth scope it is possible to use the default one, prepopulated in the installer. |
|
Client ID of your ObserveID instance |
The Client ID of your ObserveID instance registered for the ObserveID Authentication Provider must be requested from the ObserveID team before the installation starts. |
|
Client Secret of your ObserveID instance |
The Client Secret of your ObserveID instance registered for the ObserveID Authentication Provider must be requested from the ObserveID team before the installation starts. |
|
URL of the ObserveID backend |
The URL should be requested from the ObserveID team before the installation starts. |
|
Connection String value |
It is optional. And if needed, Application Insights of Azure Monitor can be used for monitoring performance. In this case, it is possible to use your Azure subscription, or ask the ObserveID team to provide both values for you. |
|
Instrumentation Key value |
ObserveID Universal Connector is installed as a service on a Windows machine. The installation is performed with an installation file that runs an installation wizard to help you go through all steps of the configuration flow and ensure the service is installed according to your requirements. Below is a list of the wizard steps with details to follow:
-
Double-click the file:
ObserveID Universal Connector.exe, to run the installation wizard.
-
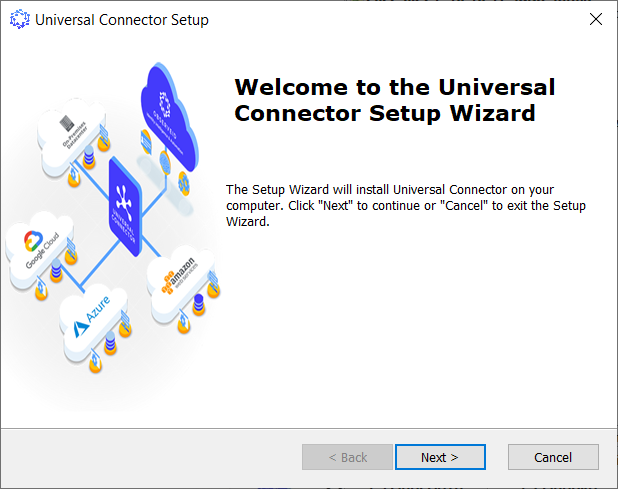
Click Next in the Welcome dialog.
-
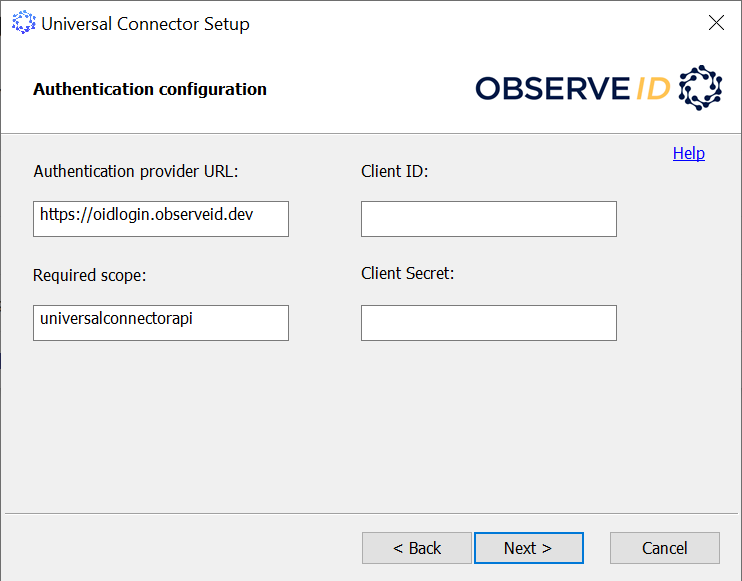
Enter the following parameters, and then click Next to move to the next installation step:
- the URL of the authentication provider received from the ObserveID team;
- for the scope, it is possible to use the default one:
universalconnectorapi, to enable the Universal Connector to work with JWT; - the Client ID of your ObserveID instance received from the ObserveID team;
- the Client Secret of your ObserveID instance received from the ObserveID team.
-
Use one of the two options of what account to provide the UC with: the default account, or a preferred account.
LocalSystemis the default local account that will be established for the UC, unless you provide the credentials of the account you prefer.- To use
LocalSystem, click Next to skip the step and to move forward. - To set up a preferred account, check Install the ObserveID Universal Connector service for this specific account, then enter the user name and the password as the credentials of the preferred account, and click Next to go to the next step.
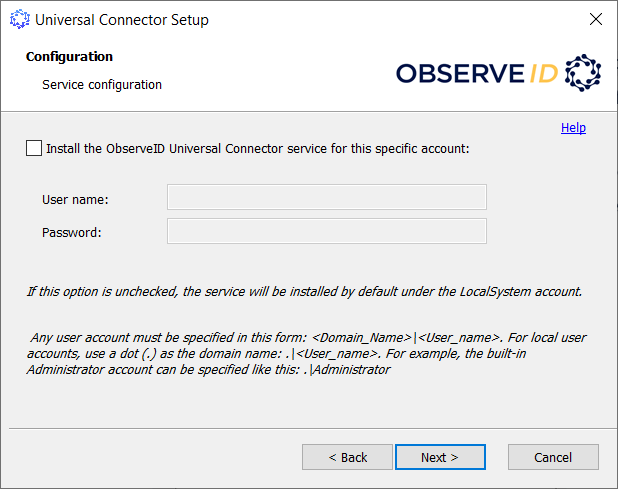
User name guidelines:
- for a domain user, use the format:
<Domain_Name>|<User_name> - for a local user account, use a dot (.) as the alias for the domain name, e.g:
.|Administrator
- To use
-
Enter the URL of the ObserveID backend received from the ObserveID team, and then click Next to move to the next step of the wizard.

-
If needed, monitoring performance can be enabled for the UC. This is an optional step that can be skipped by clicking Next and moving forward.
To enable monitoring, enter the Ingestion Endpoint and the Instrumentation Key. Both values are provided by Azure’s Application Insights, and allows you to connect the UC with Azure’s agent that gathers and sends its telemetry to Azure for analysis and presentation.
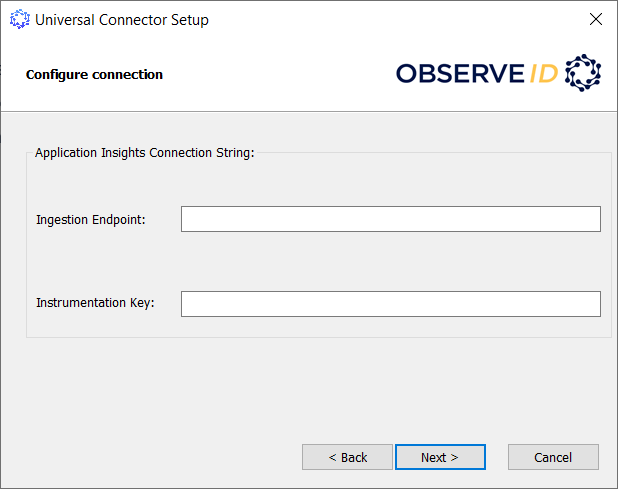
For this option, an Azure account is needed. If your organization already has an Azure subscription, ask your administrator to add the UC to Application Insights, and provide you with the values. If you don’t have an Azure account, ask the ObserveID team to provide both values for you. Below is the list of values needed:
- the Connection String value, which is entered into the Ingestion Endpoint field,
- the Instrumentation Key value, which is entered into the Instrumentation Key field.
-
If needed, specify a preferred installation folder, or use the following default folder: C:\Program Files\ObserveID\Universal Connector\ and click Next to move forward.

-
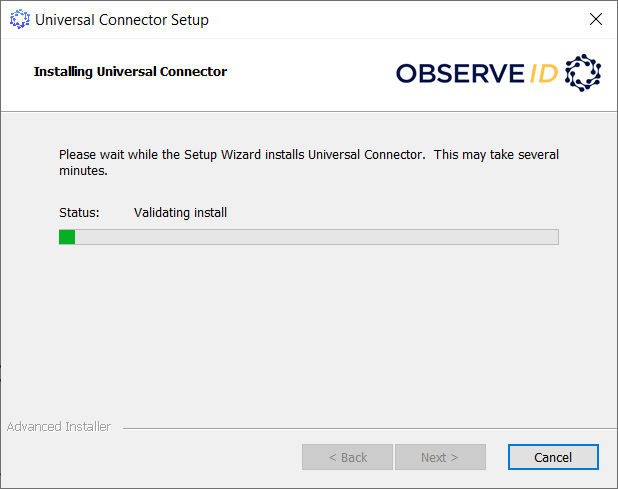
Click Install to start the installation of the UC.

-
With the Status bar, it is possible to observe how the installation goes.
-
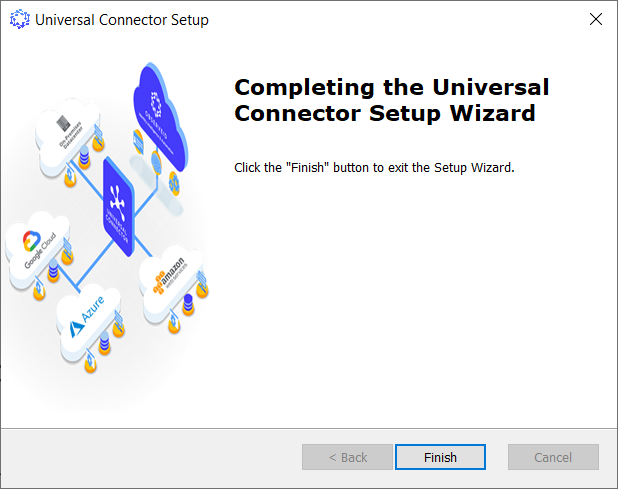
Once the installation is finished, the Completing the Universal Connector Setup Wizard dialog shows up. Click Finish to finish the installation.
Once installed, the ObserveID Universal Connector is registered as a Windows service and can be managed through the system services interface (for example, started, stopped, or restarted).
-
Open Windows Services (
services.msc). -
Verify Service Installation and Status.
- Locate ObserveID Universal Connector in the list of services.
- Confirm that the service status is Running.
- If the service is not running, start the service manually.
- If required, restart the service to ensure proper initialization after installation.
-
Configure Startup Type.
- In Windows Services, right-click ObserveID Universal Connector and select Properties.
- Open the General tab.
- Set Startup type to Automatic.
- Click Apply, then OK to save the configuration.
-
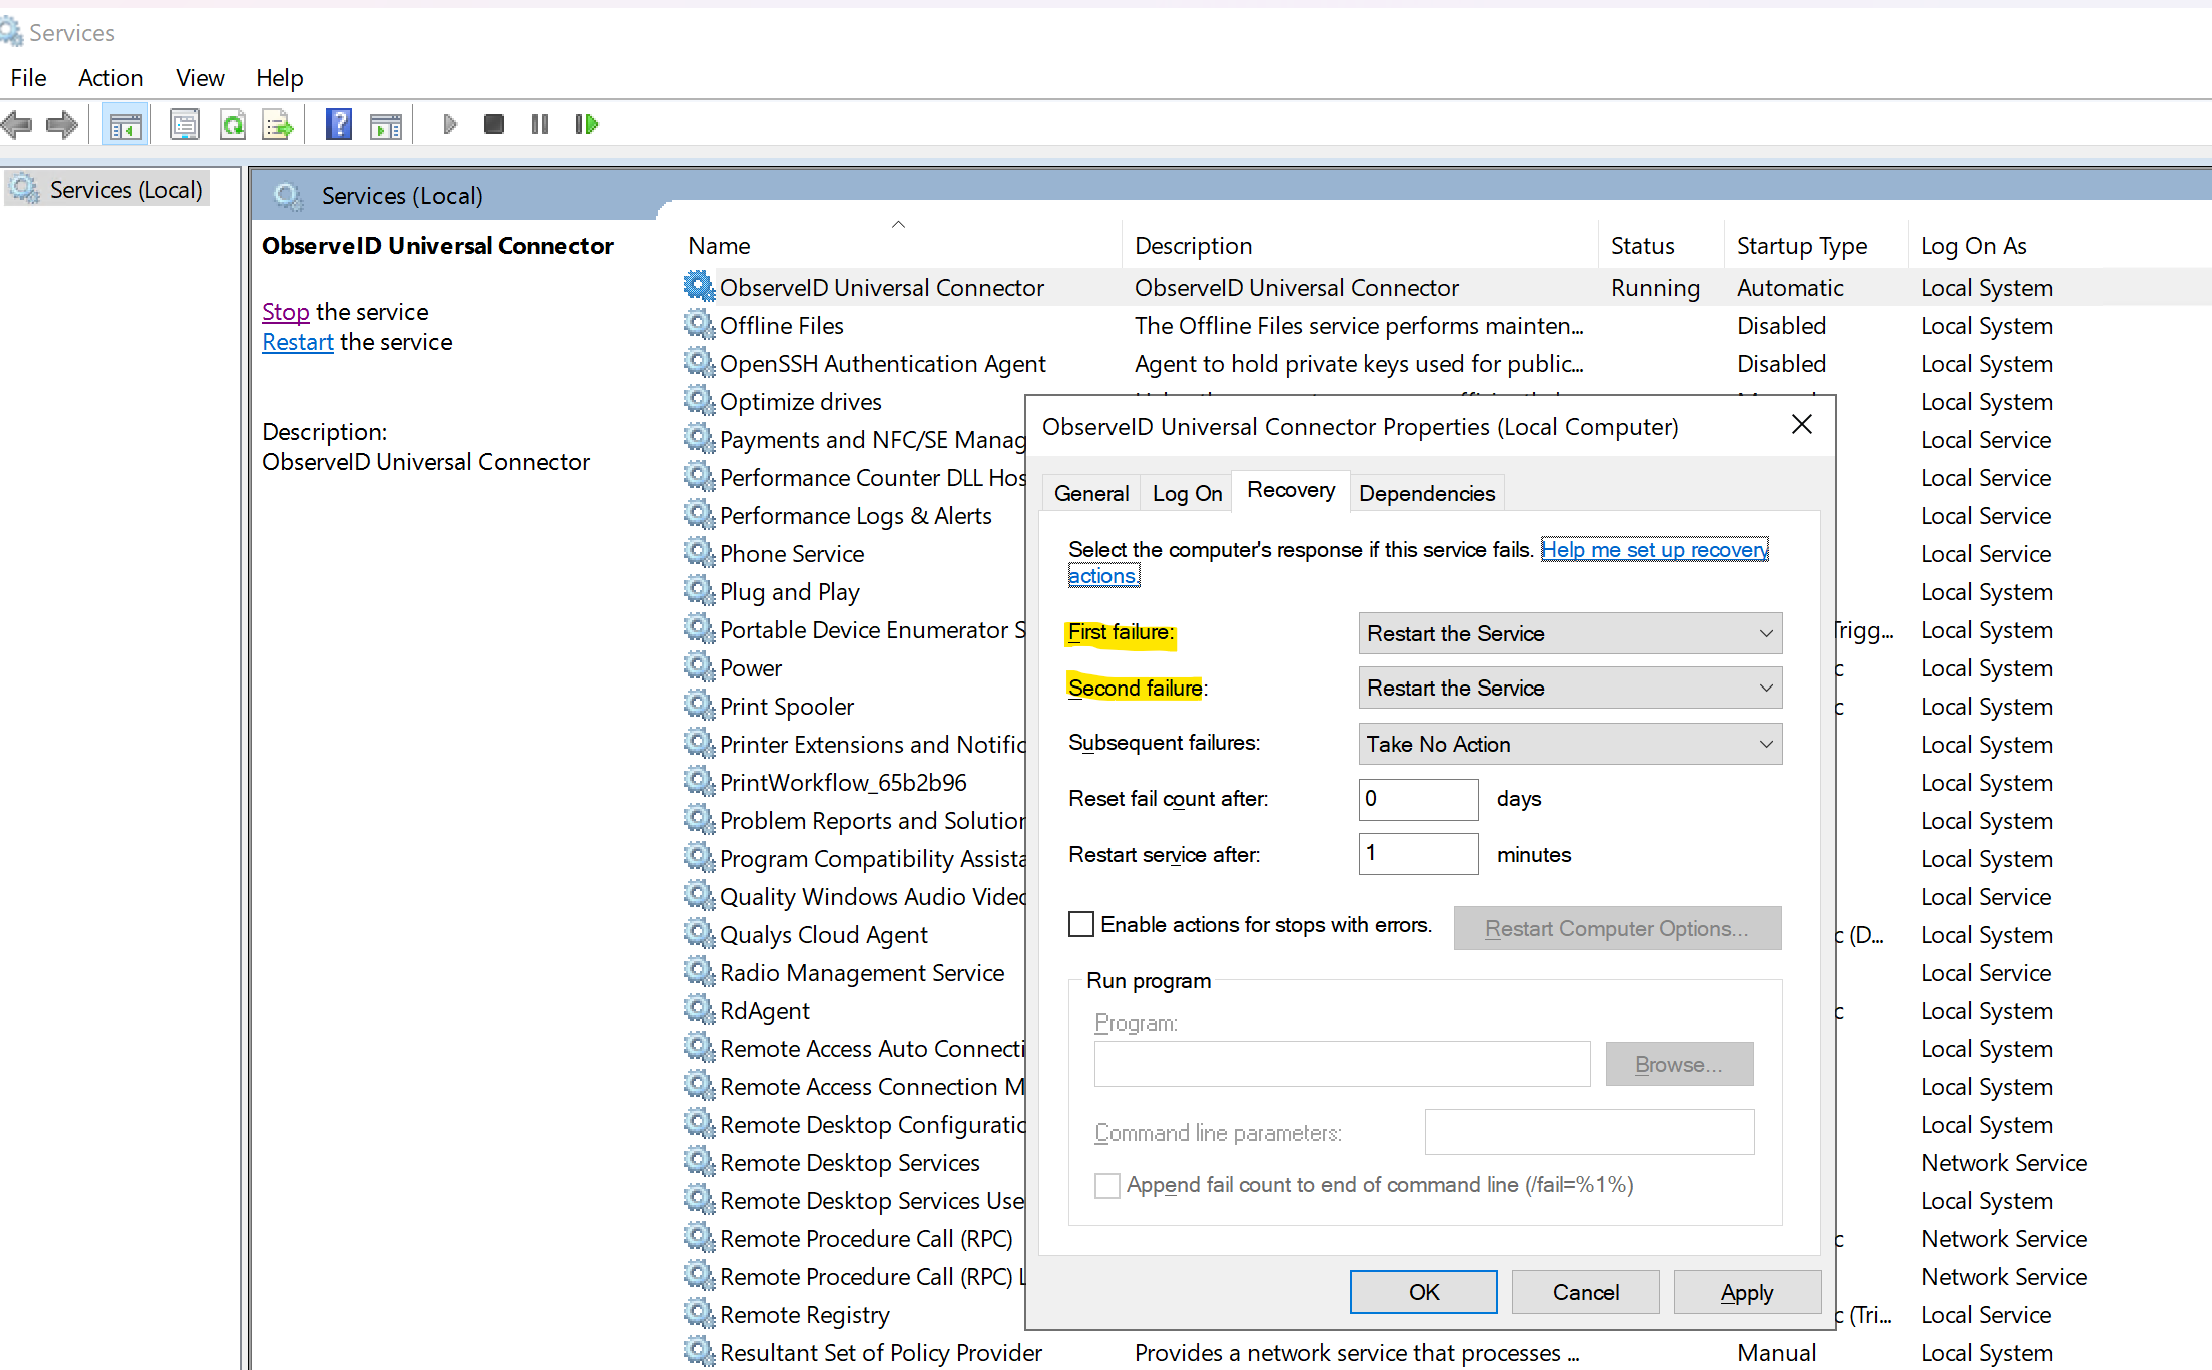
Configure Service Recovery Options.
- In the ObserveID Universal Connector Properties window, open the Recovery tab.
- Set First failure to Restart the Service.
- Set Second failure to Restart the Service.
- Click Apply, then OK to save the configuration.