Detailed tutorial on creating Azure AD integration
The tutorial below provides a step-by-step guidance on the setup and configuration of an Azure AD integration. It includes three aspects: preparation on the Azure AD side; preparation on the ObserveID side, and the First Load of Integration Data from the Target to ObserveID. Once the data is loaded, the Integration is ready for further configuration of rules and use according to the business processes in the organization.
In this section:
- Preparation for ObserveID in the Azure portal
- App registration
- API permissions for base capabilities
- API permission for Exchange Online
- Admin consent
- Azure IAM Role
- Azure AD Role
- Configuration of Azure AD integration in ObserveID
- First load of data from Azure AD to ObserveID
Preparation for ObserveID in the Azure portal
-
Log in to the Azure portal: https://portal.azure.com
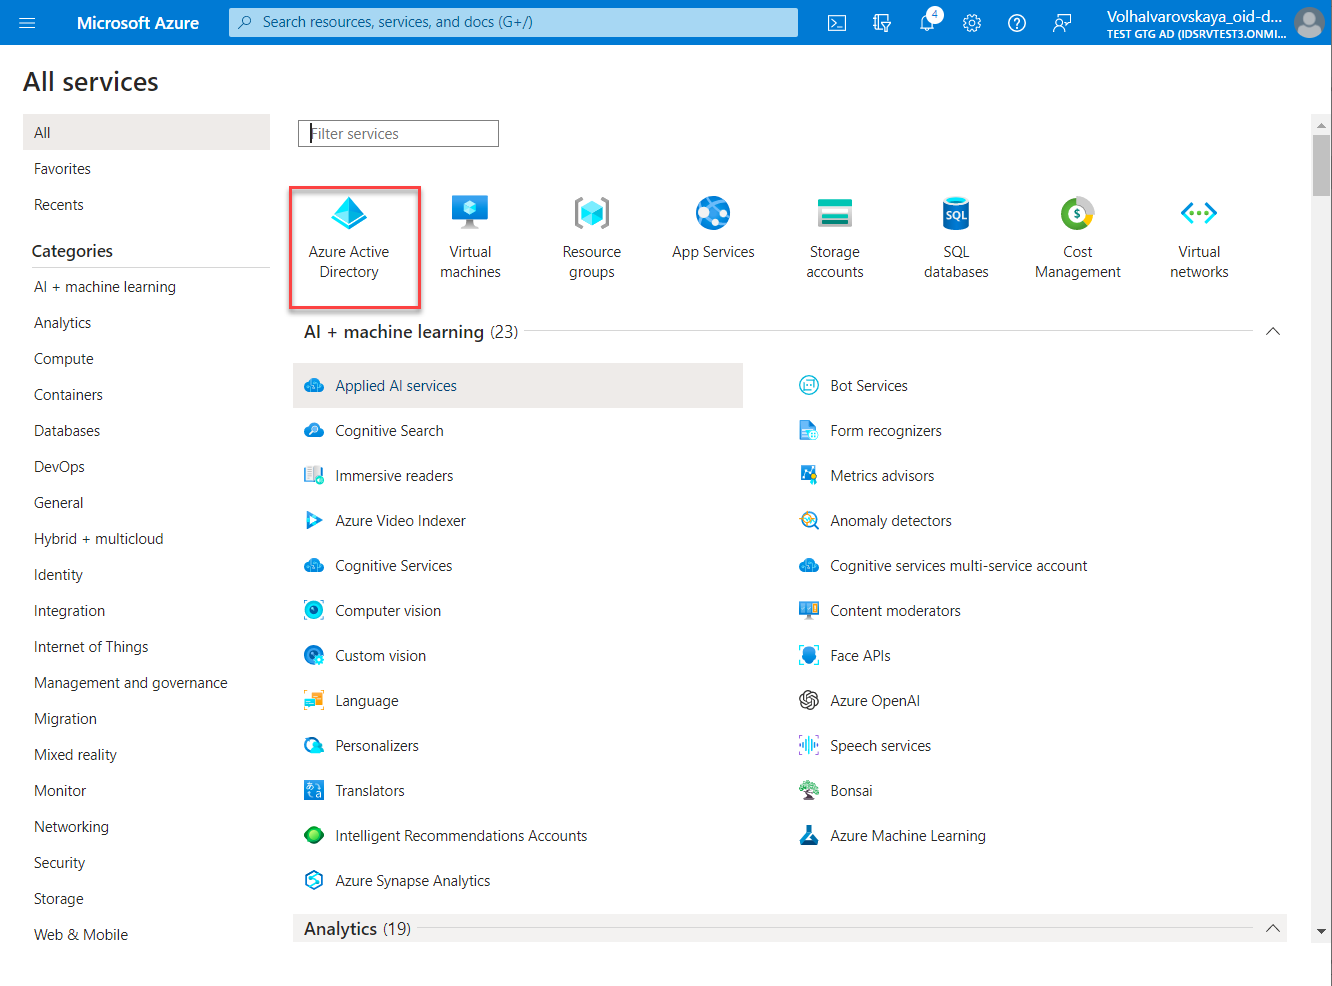
And the Home page of the portal opens. Use the More services link to view all available services.
 Home page of the Azure portal
App registration
The app registration in the Azure Portal is required to enable the communication between ObserveID and Azure Active Directory using Microsoft Graph API and Azure Management API. To go through the registration of ObserveID on the Azure portal, do the following:
- Click More services
- Click Azure Active Directory
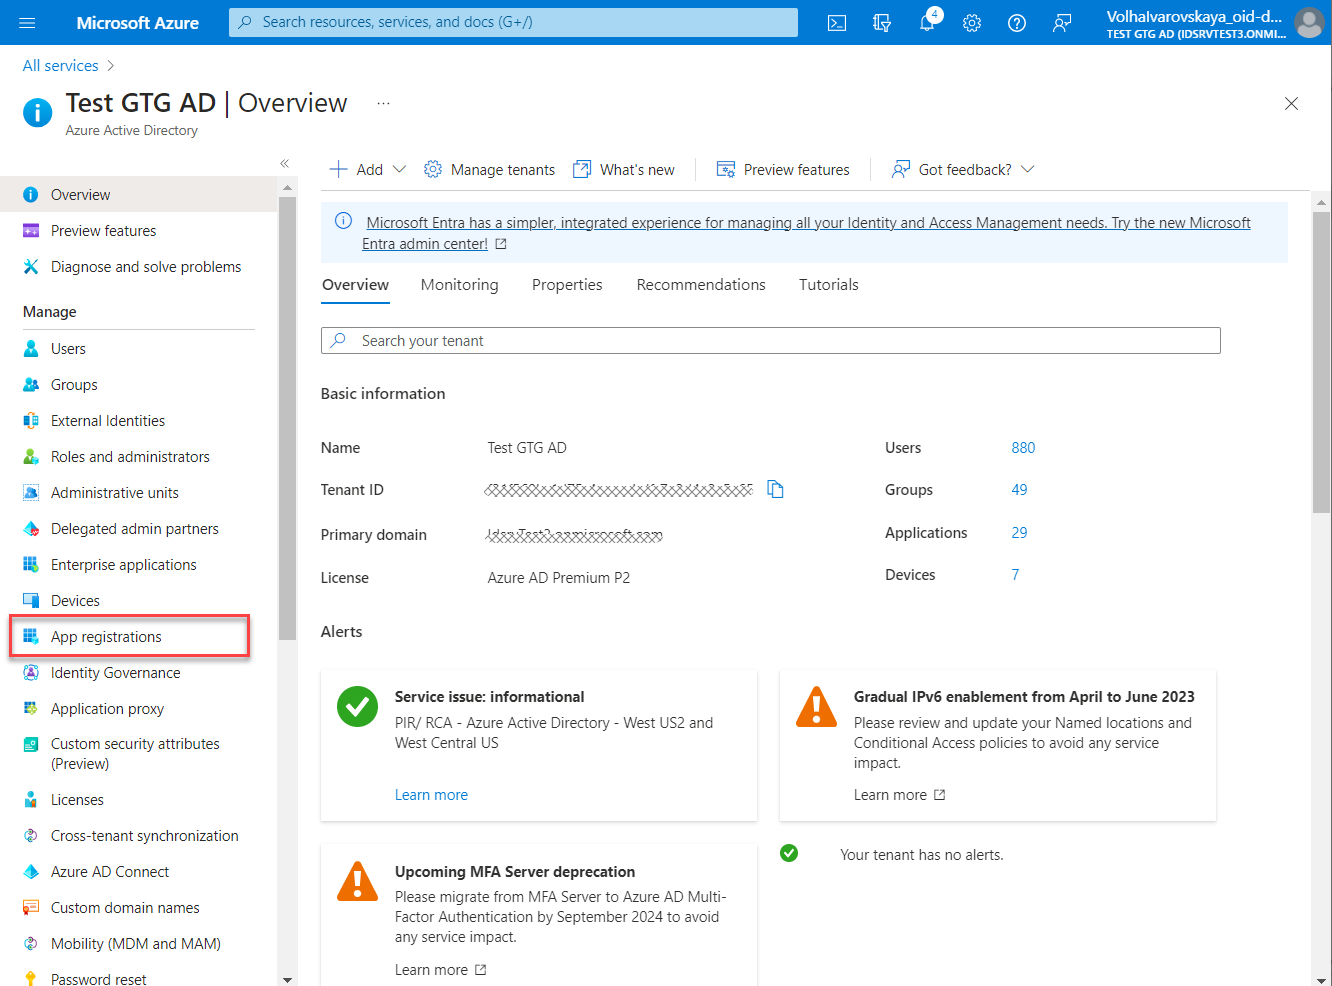
- Click App registrations in the opened Azure Active Directory.
- Click New registration in the App registrations area.
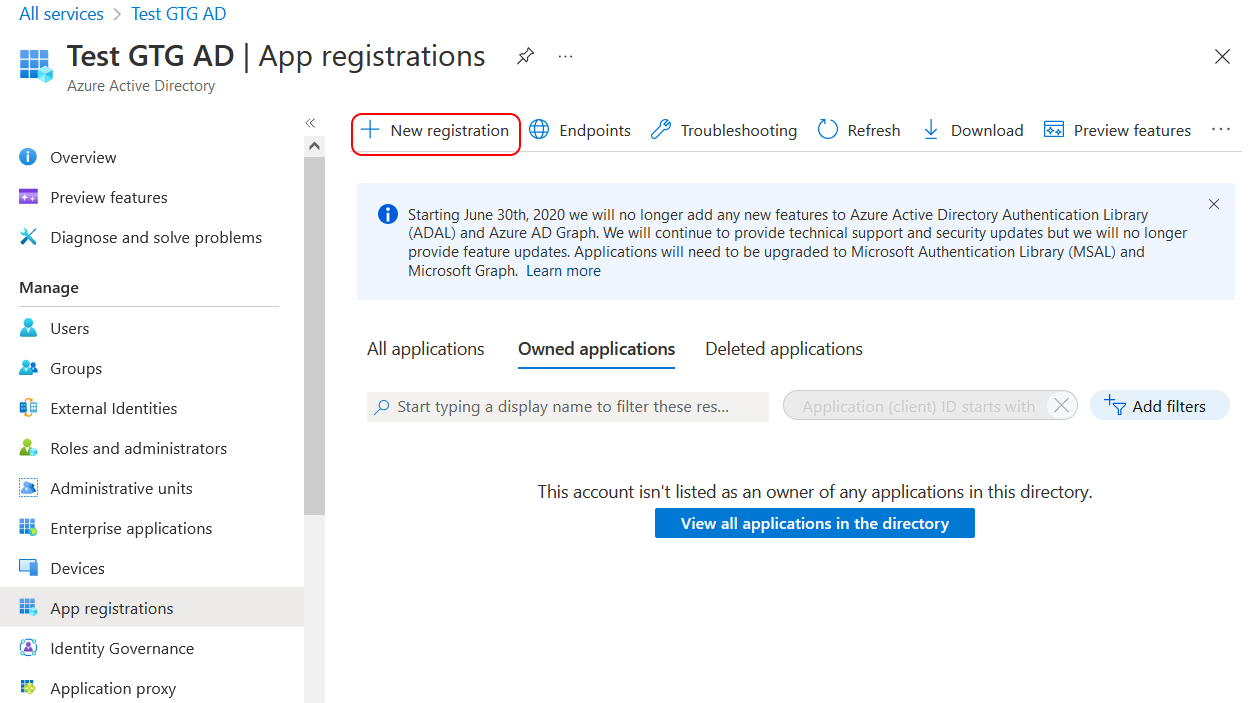
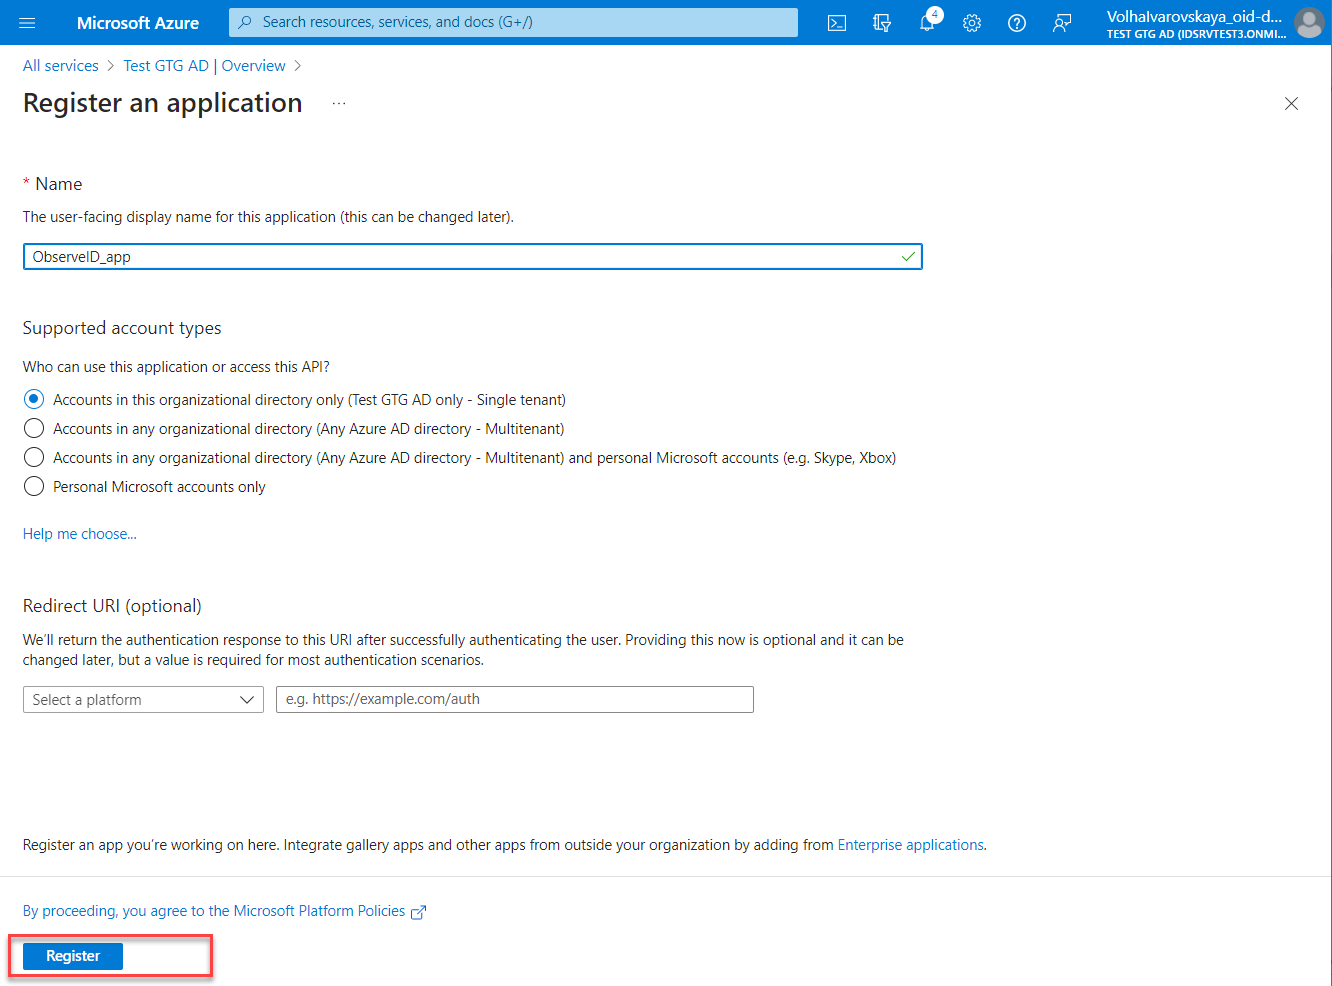
- Enter the application's name on the opened Register an application page, then select the Single Tenant option from Supported account types, and click Register.
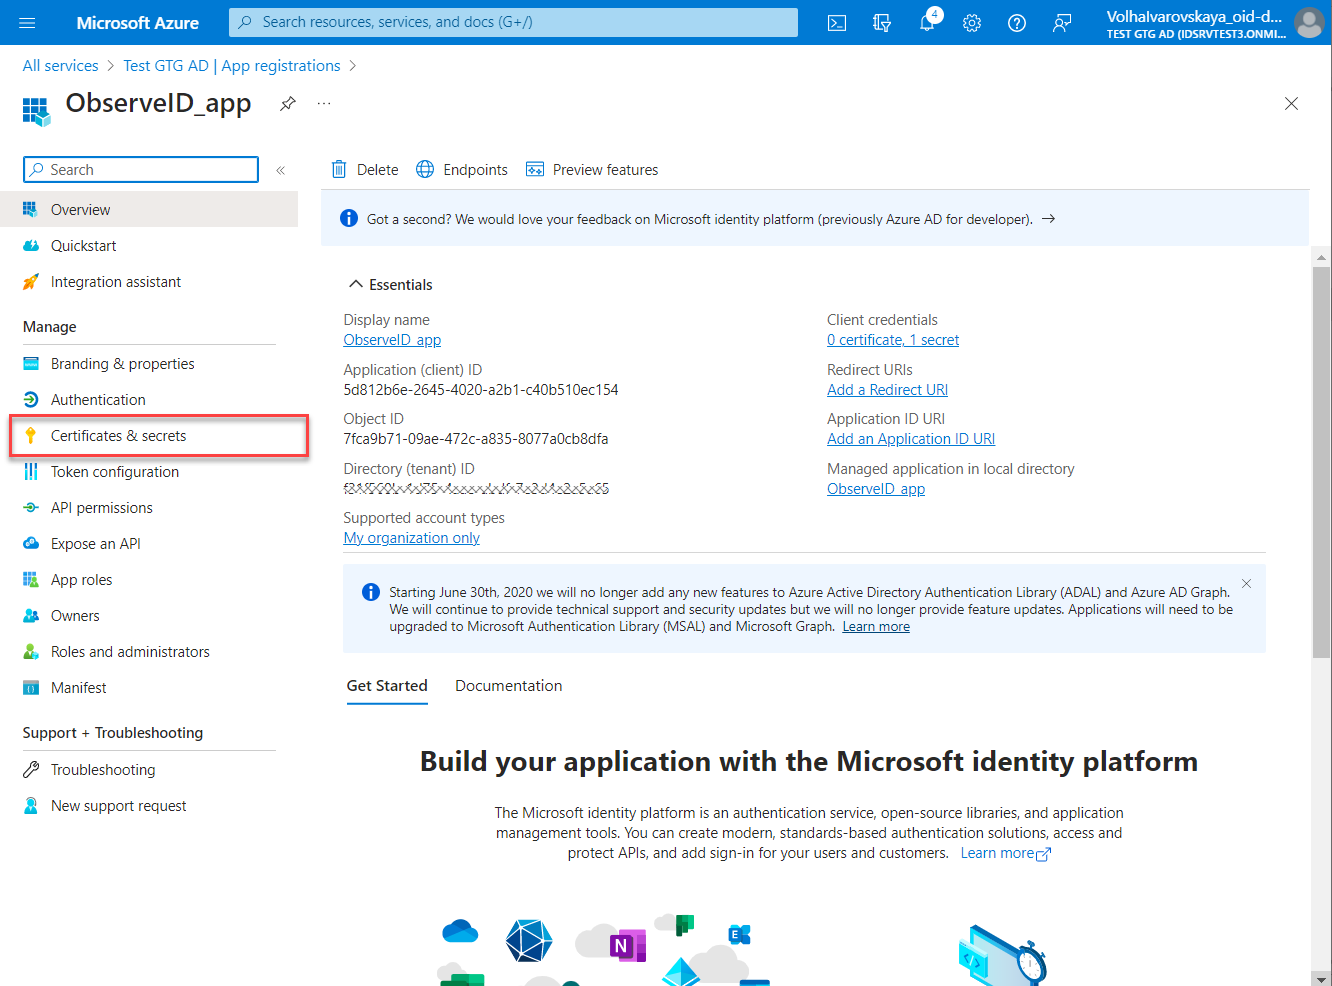
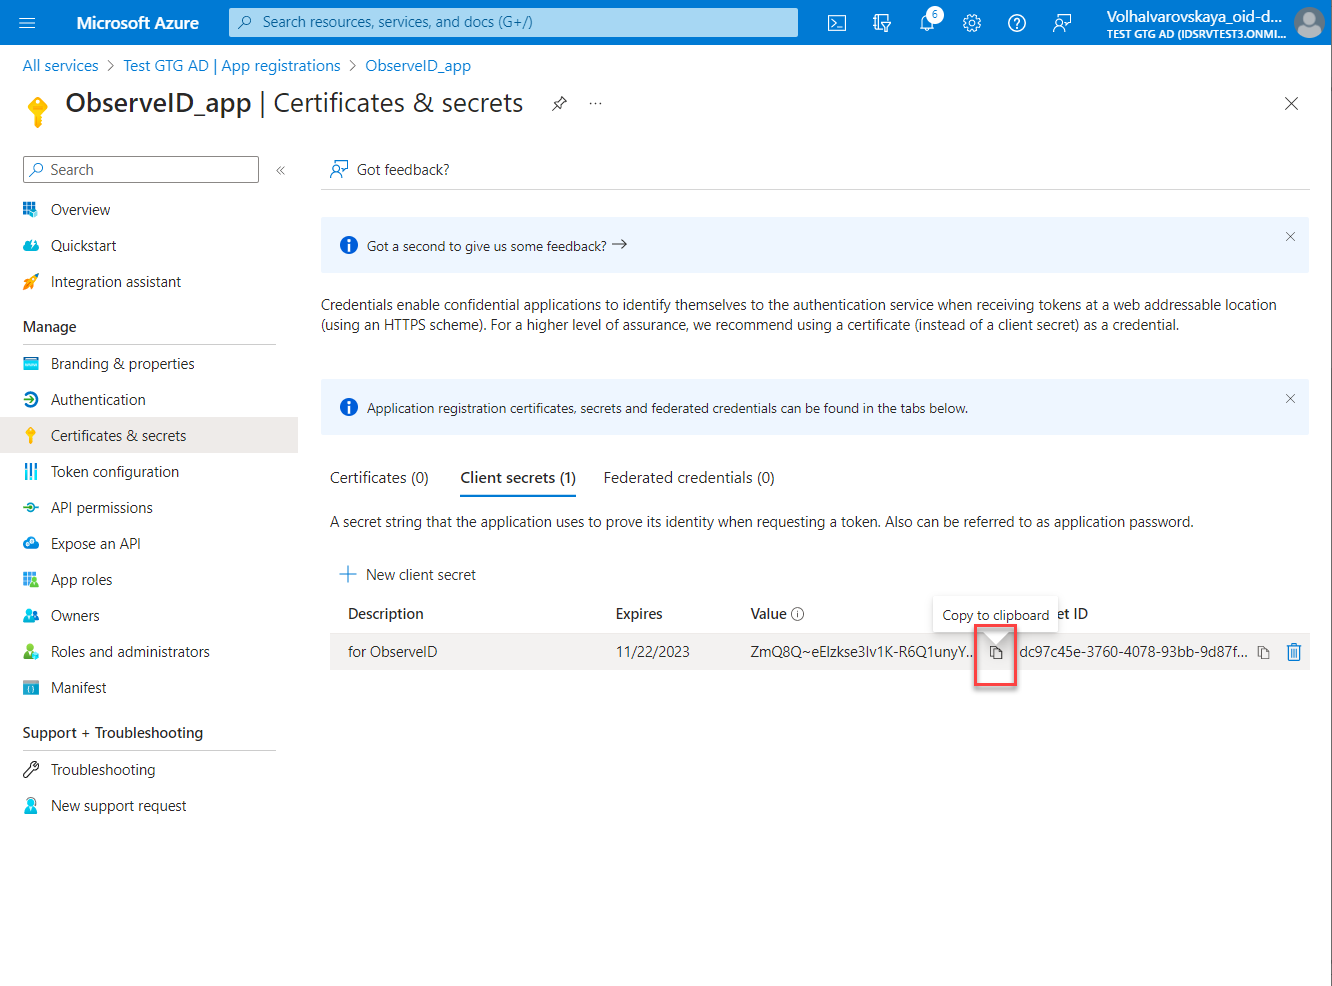
- Open the created application registration, and click Certificates & secrets.
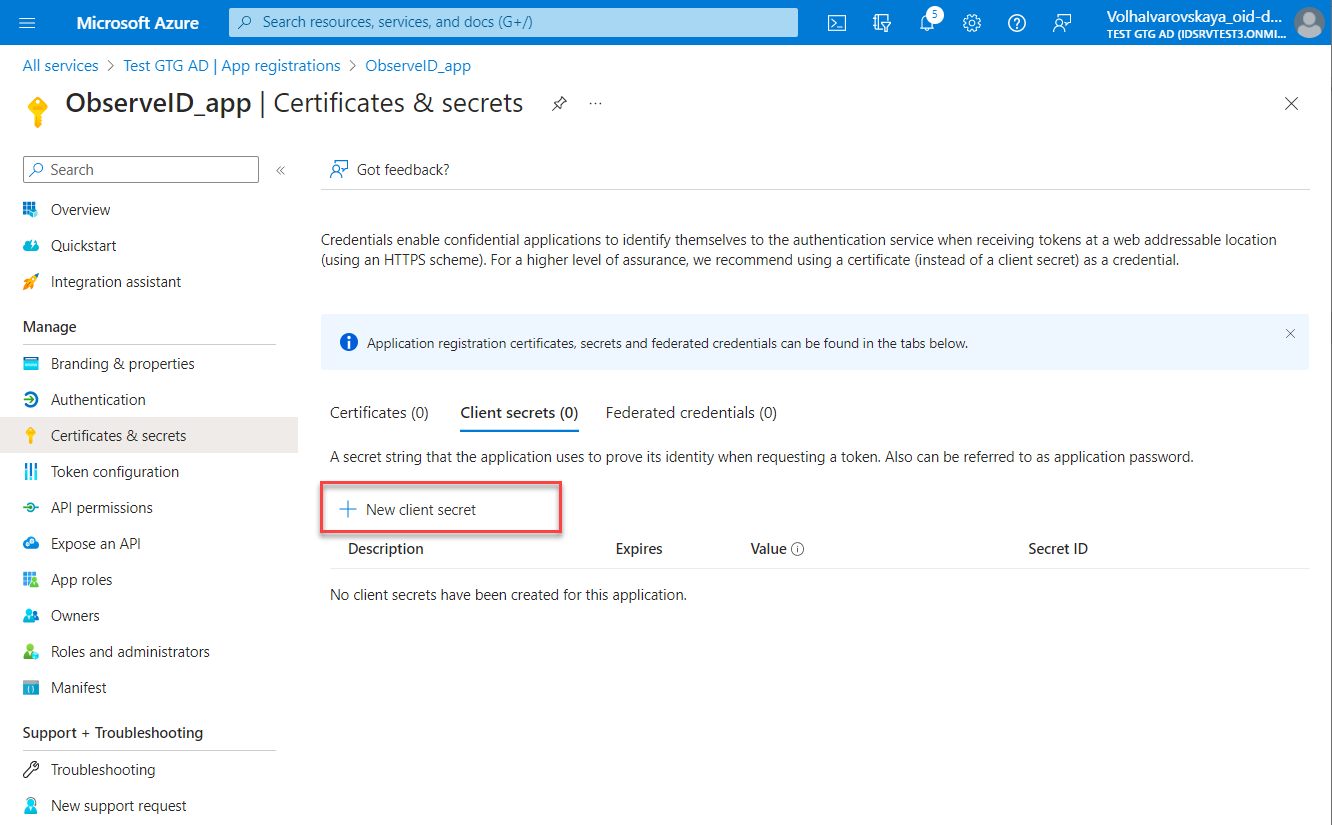
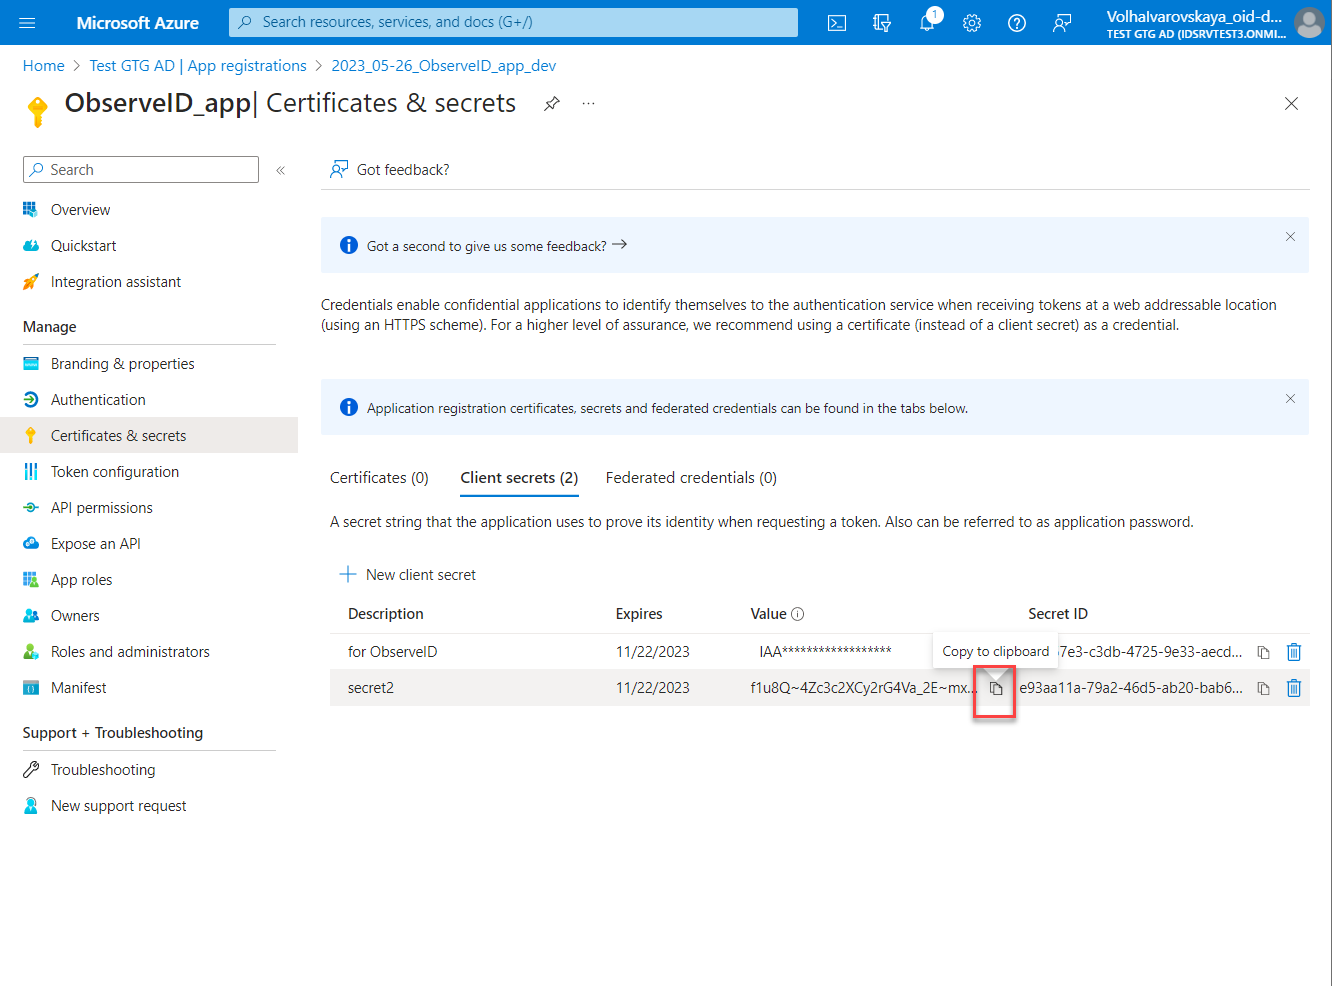
- Click New client secret on the Certificates & secrets page.
- Enter Description and select the expiration period in the Expires field for the new secret. Click Add.
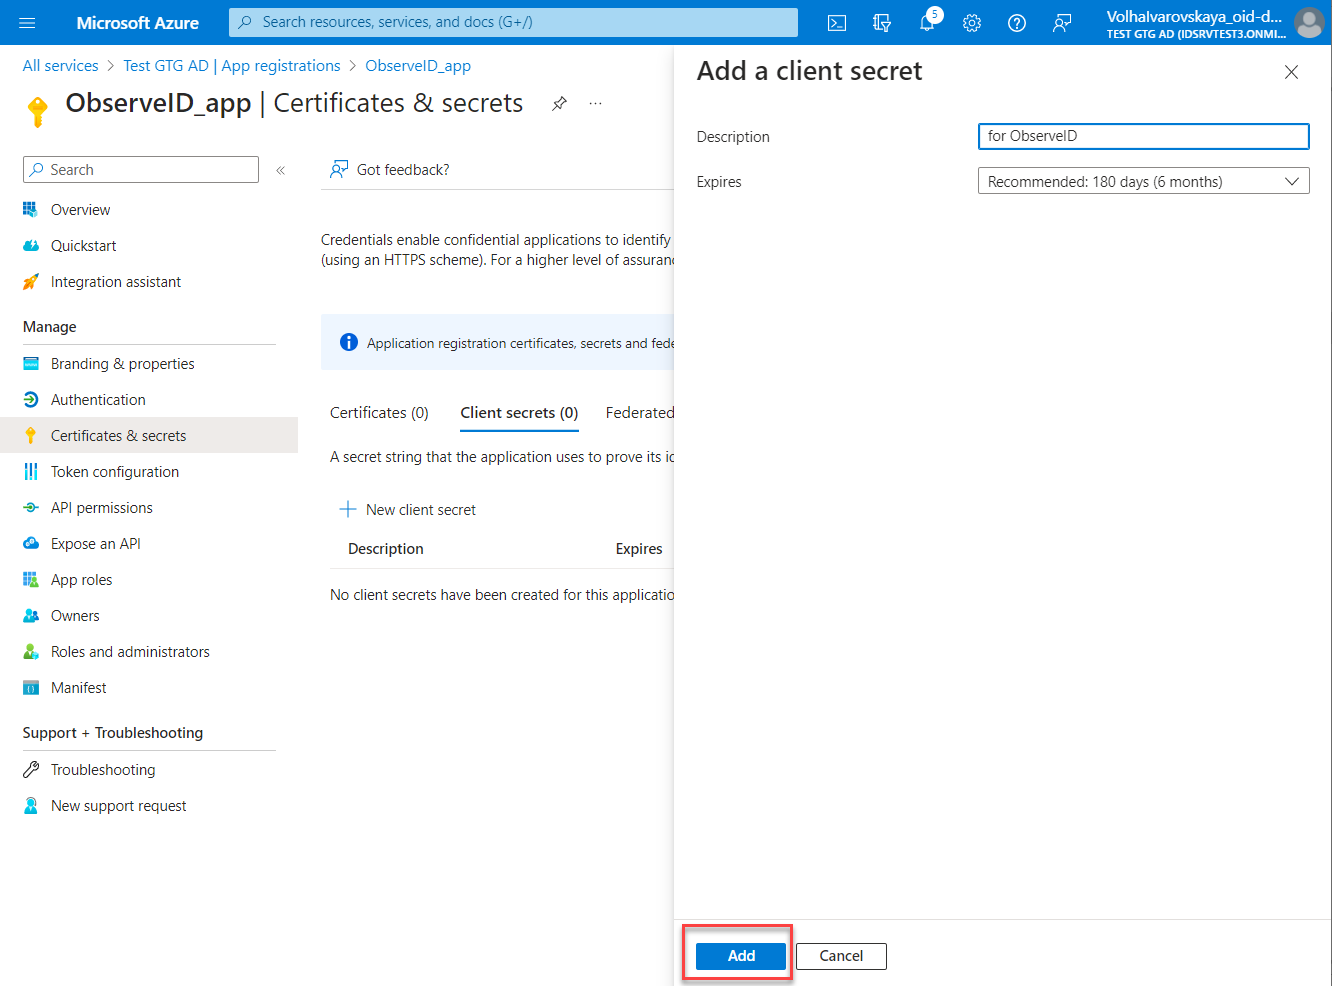
- Copy the Value of the generated secret, and save it for further use when filling out the connection details of the Azure AD integration in ObserveID. The Value (not the Secret ID) is visible only upon generation, and if not saved, the secret would need to be re-generated anew to be able to copy its Value.
API permissions for base capabilities
As a general approach inTo add the API permissions to the registered app on Azure AD, do the following:
- Open: Azure Portal > All Services > Active Directory > App Registrations > {the registered app} > API permissions
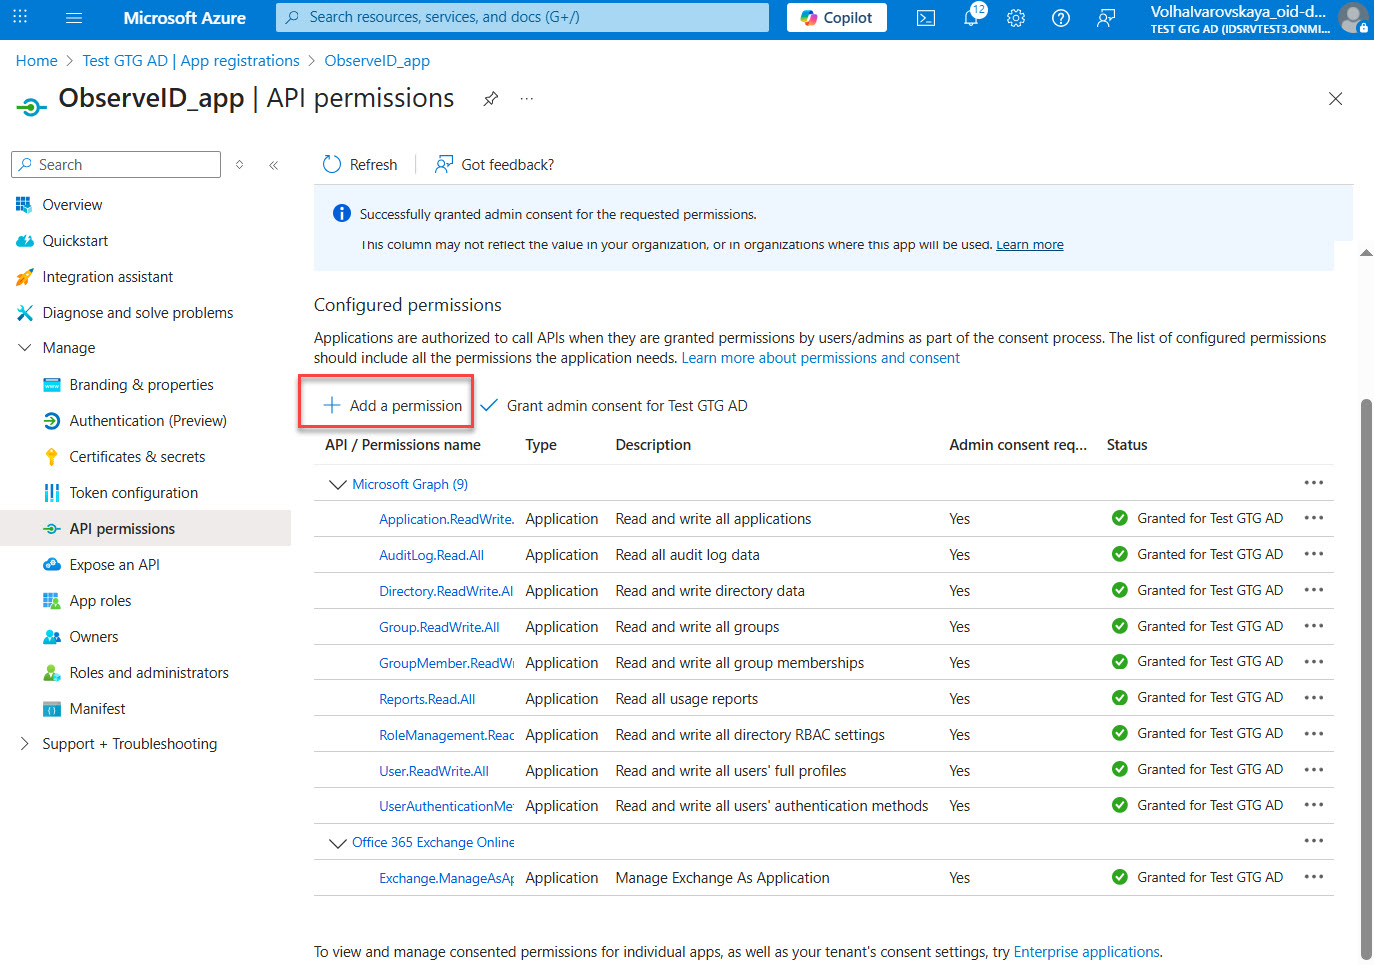
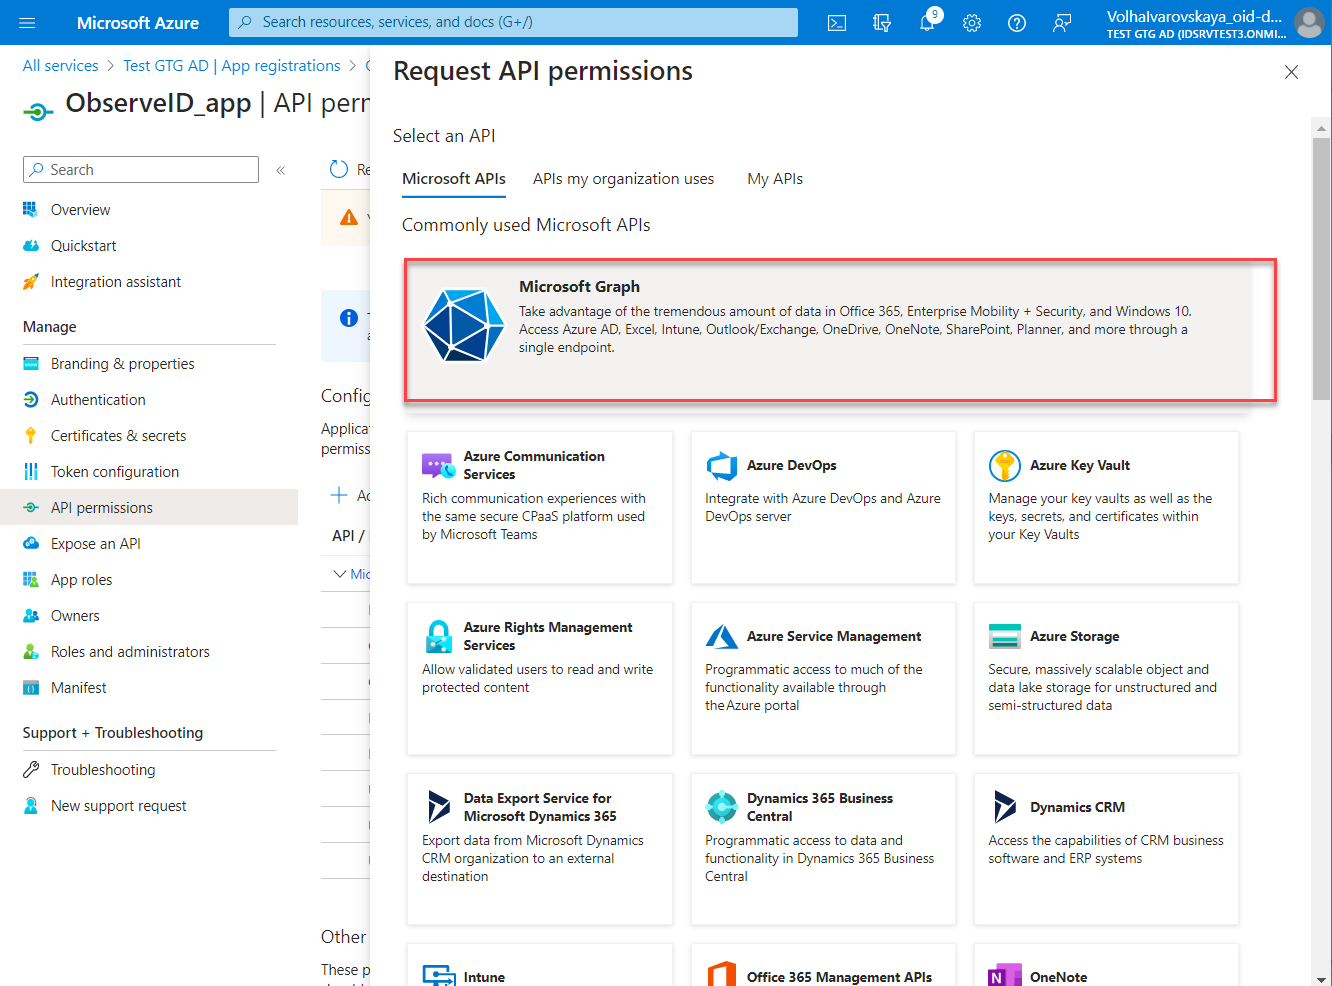
- Click Add a permission, and select Microsoft Graph.
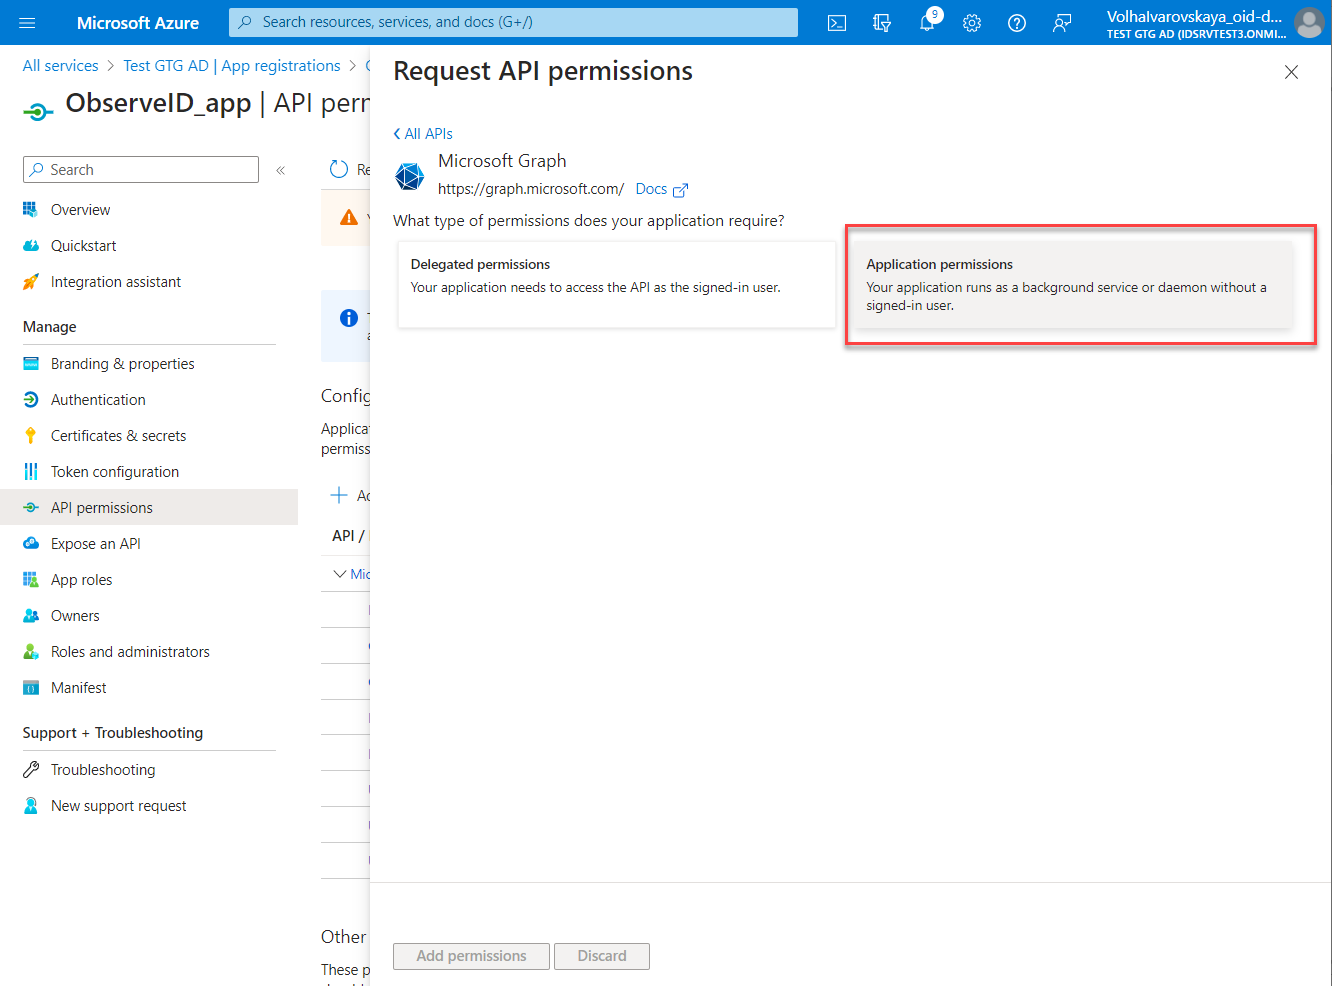
- Select the permission type: Delegated or Application according to the minimum permission requirements in relation to each specific permission. The permission requirements are specified in the Prerequisites part of the Azure AD integration setup.
- Start typing the permission name in the search bar, then select the required permission among the search results in the Permissions grid. Once ready, click the Add permissions button.
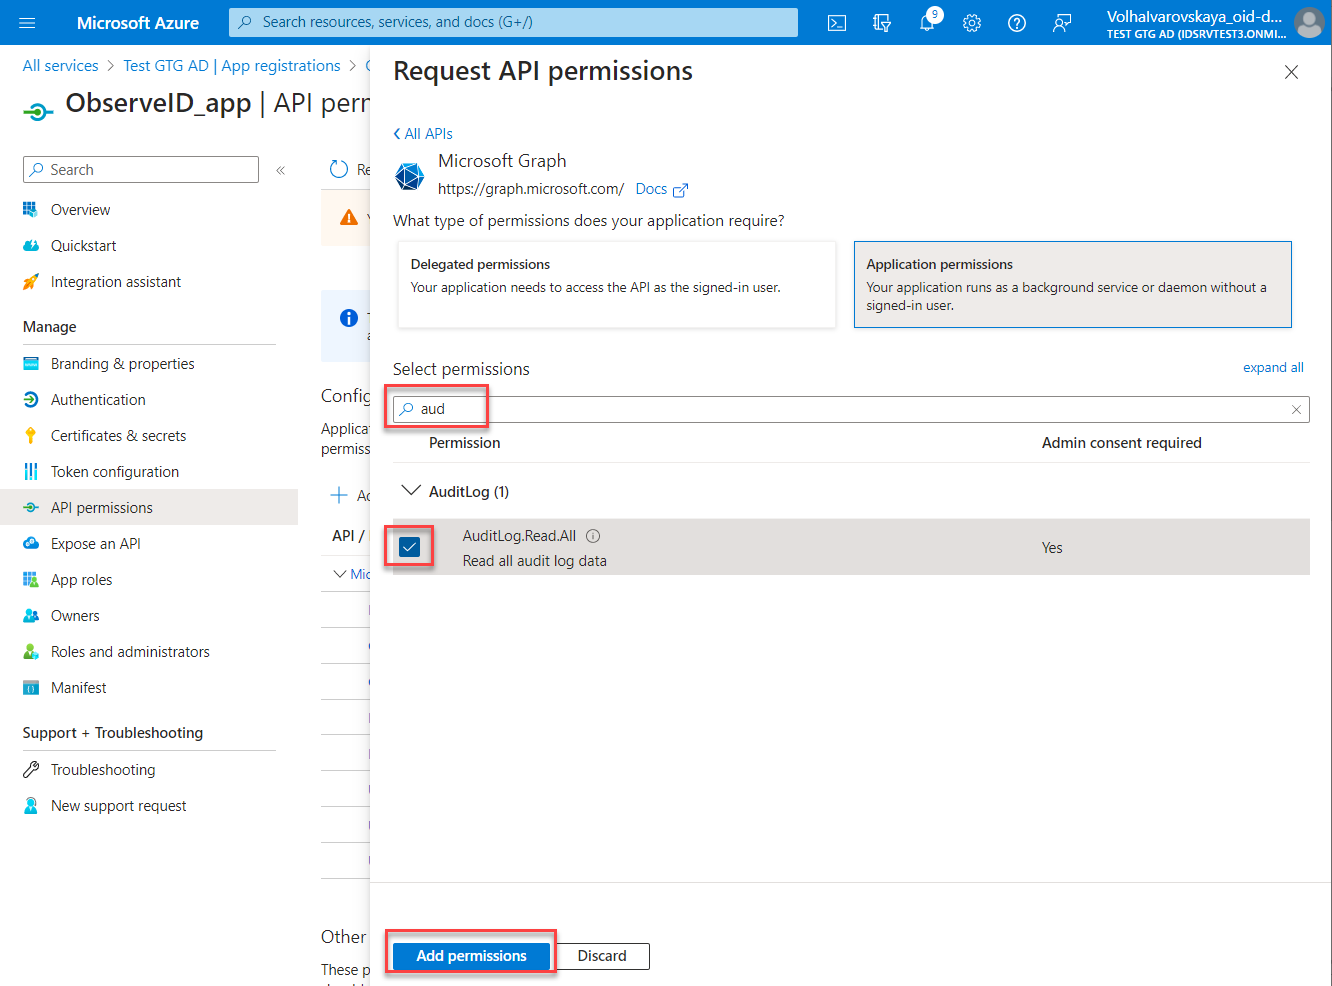
- Repeat the steps above to add as many permissions as needed, according to the minimum permission requirements specified in the Prerequisites part of the Azure AD integration setup.
API permission for Exchange Online
Please, note that to connect Exchange Online environment in Microsoft 365, the Azure Active Directory licenses should have any of the following:
- Microsoft 365 for business,
- Microsoft 365 for enterprise,
- a standalone Exchange Online plan.
To provide the ObserveID app in the Azure portal with an access to Exchange Online, the required API permission specified in the minimum permission requirements of the Prerequisites part of the Azure AD integration setup should be added as follows:
- Click API permissions in the menu of the app: Azure Portal > All Services > Active Directory > App Registrations > {the registered app} > API permissions

- Click Add a permission on the API permissions page.
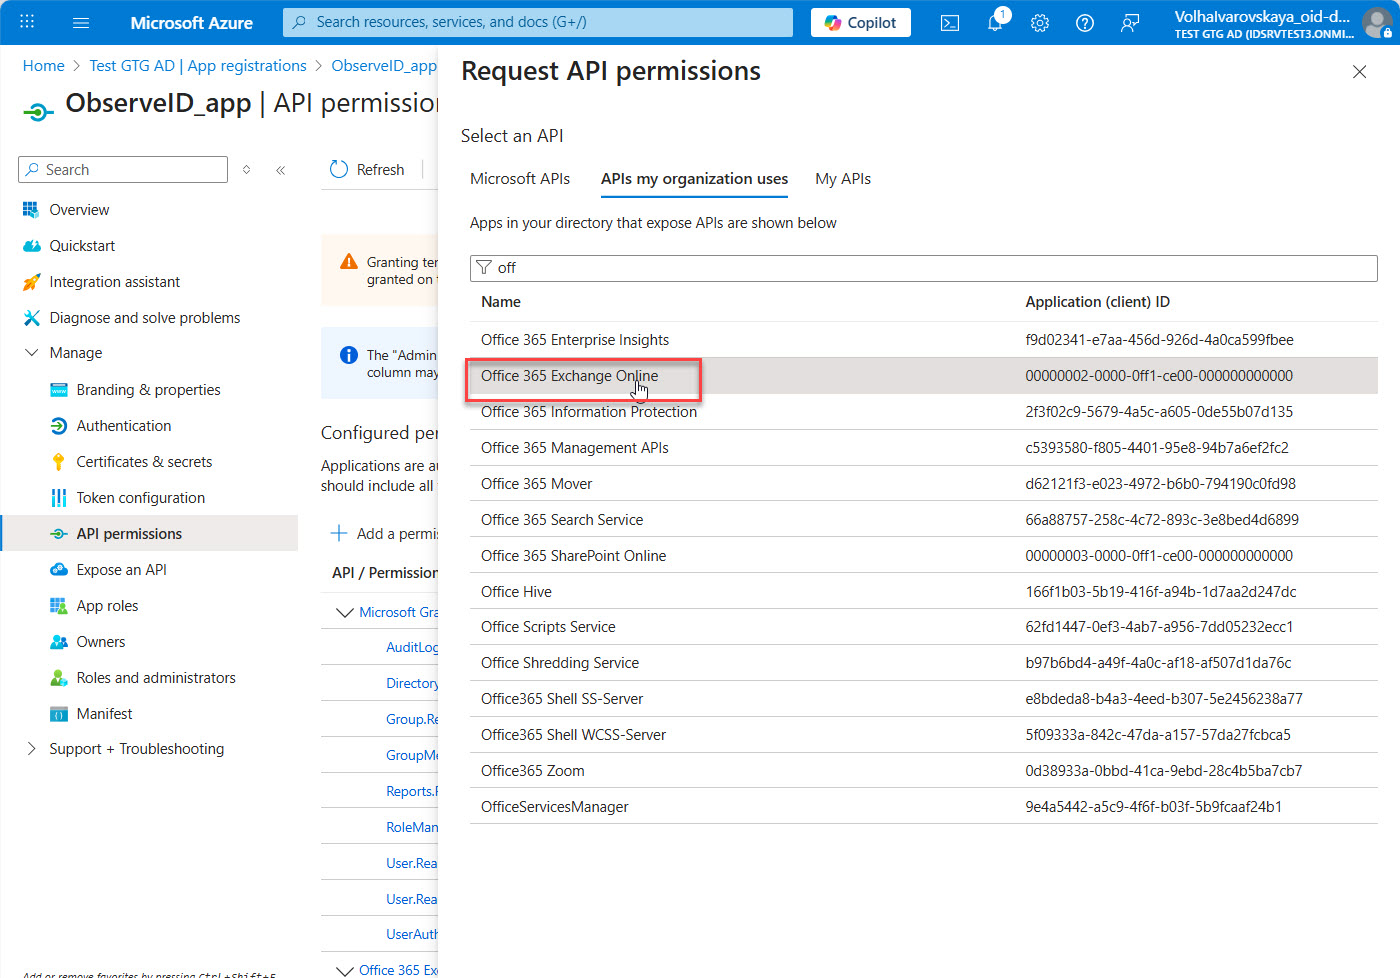
- Open the APIs my organization uses tab on the Request API permissions popup window.

- Start typing Offic.. in the search bar of the popup window.
- Click Office 365 Exchange Online among the search result options.
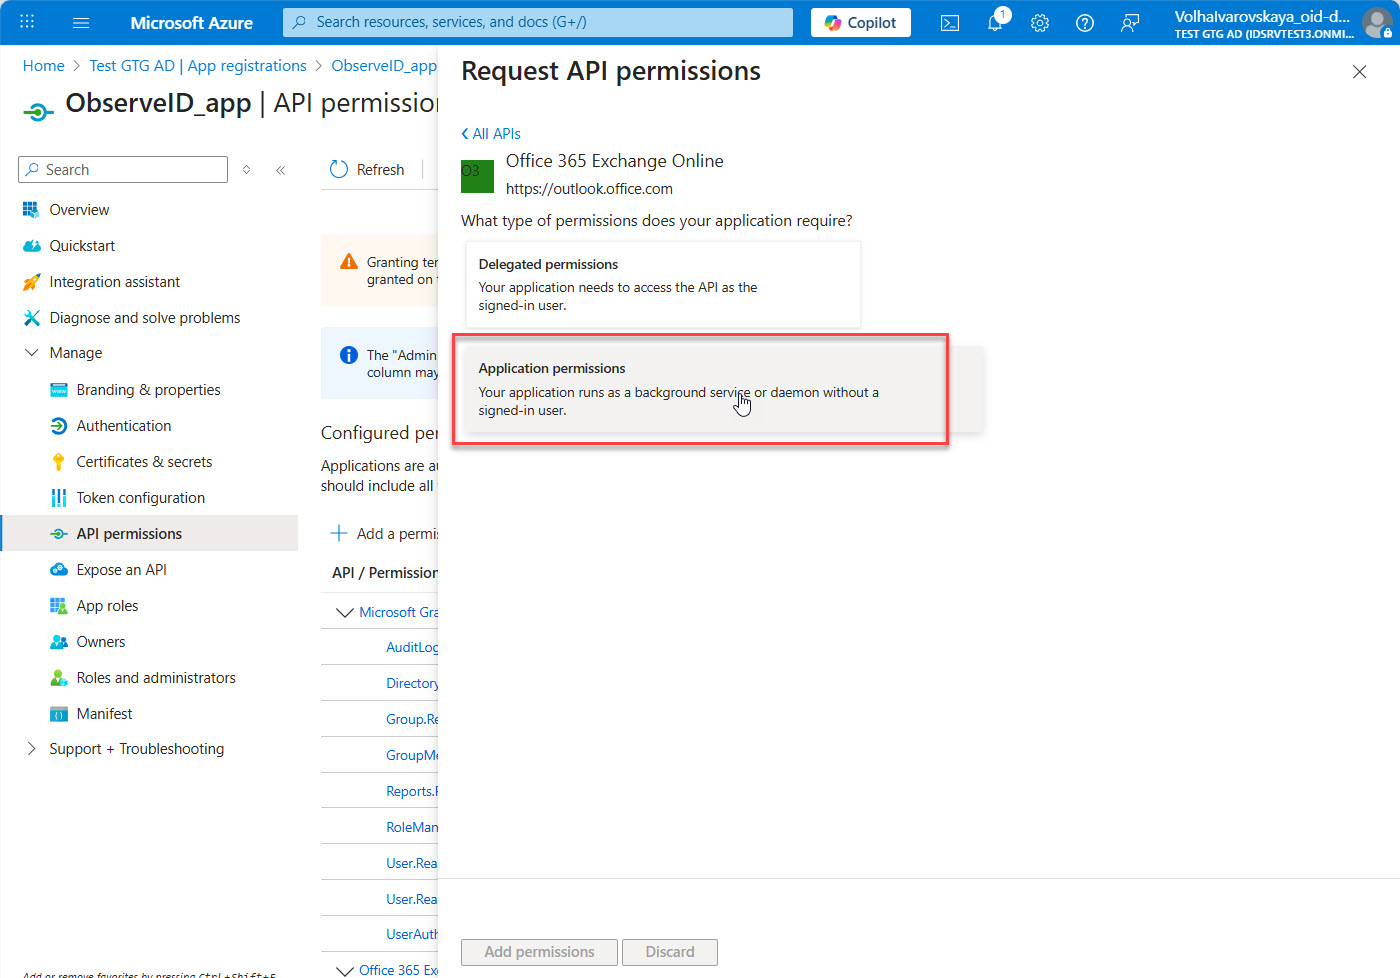
- Select Application permissions.
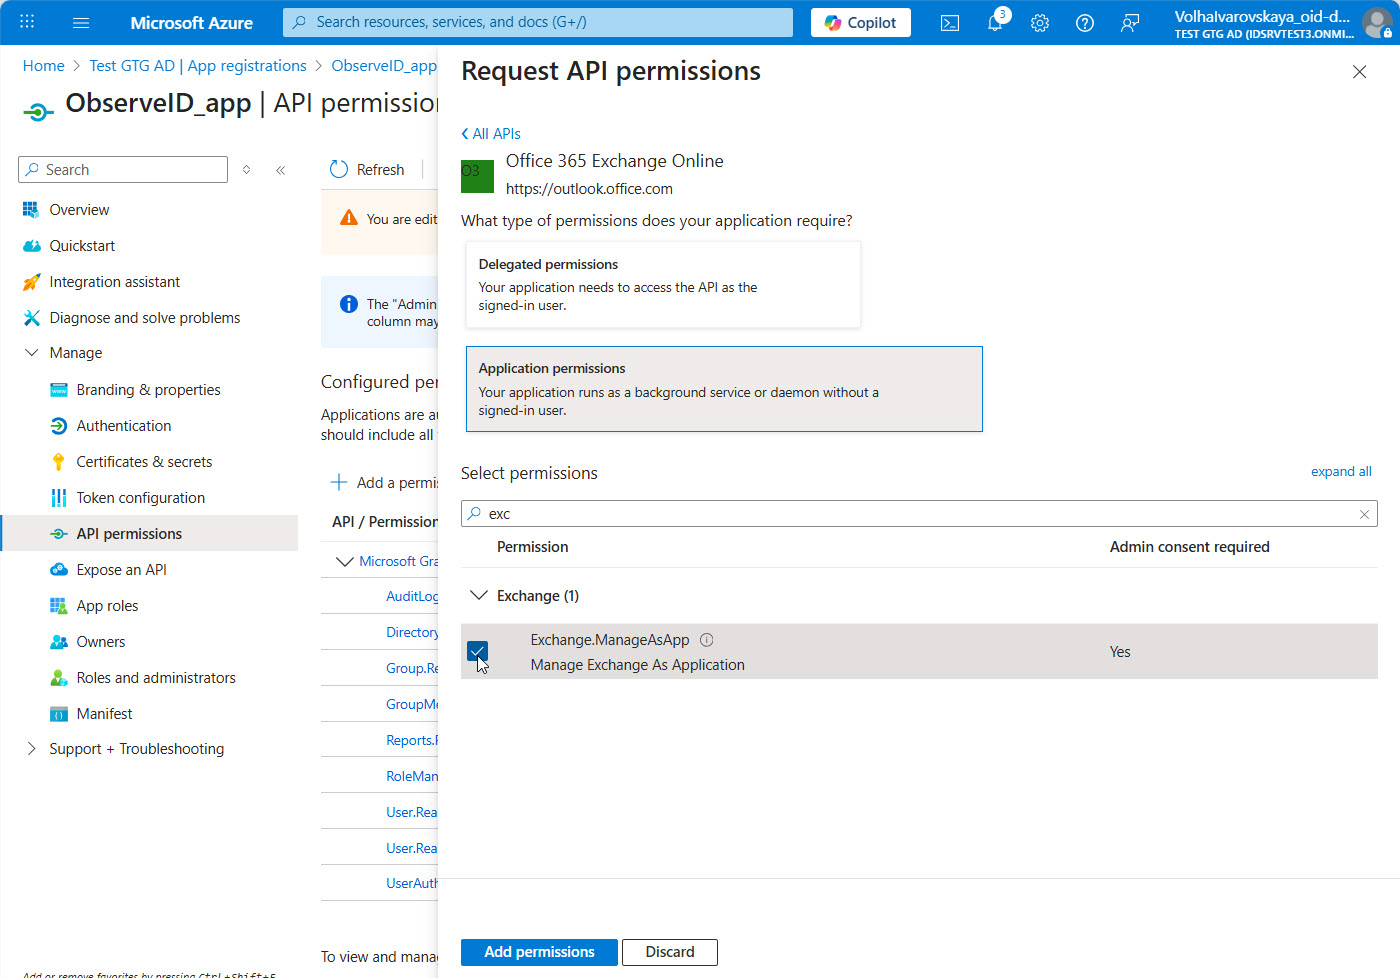
- Start typing exch… in the search bar, and then select
Exchange.ManageAsApppermission among the search results. - Click the Add permissions button at the bottom of the page.
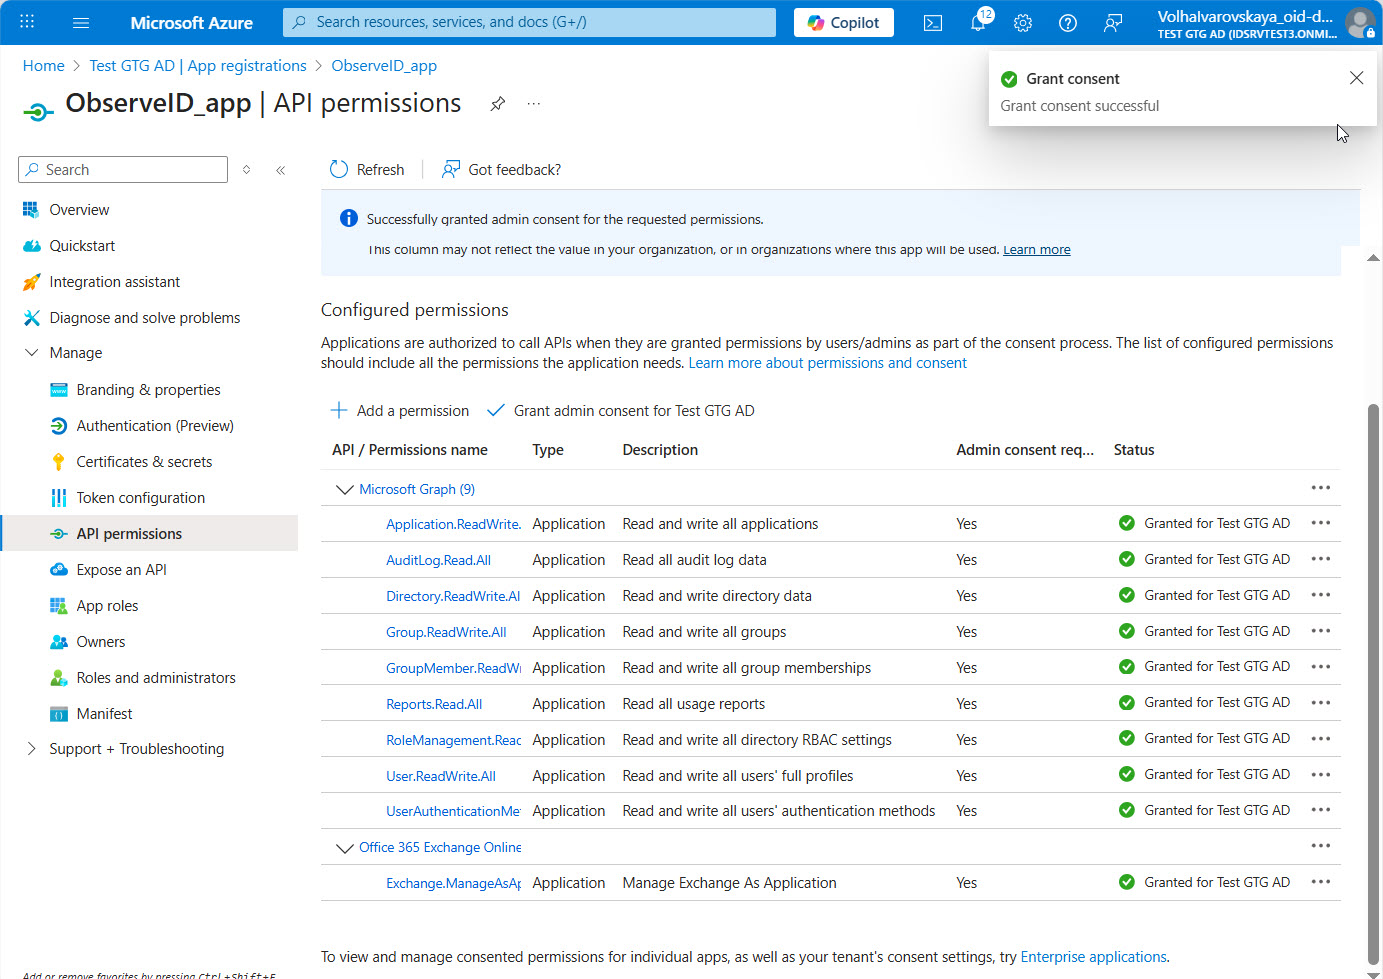
- Click Grant admin consent and follow the subsequent steps. With the admin consent granted, the API permission assignment is finished.
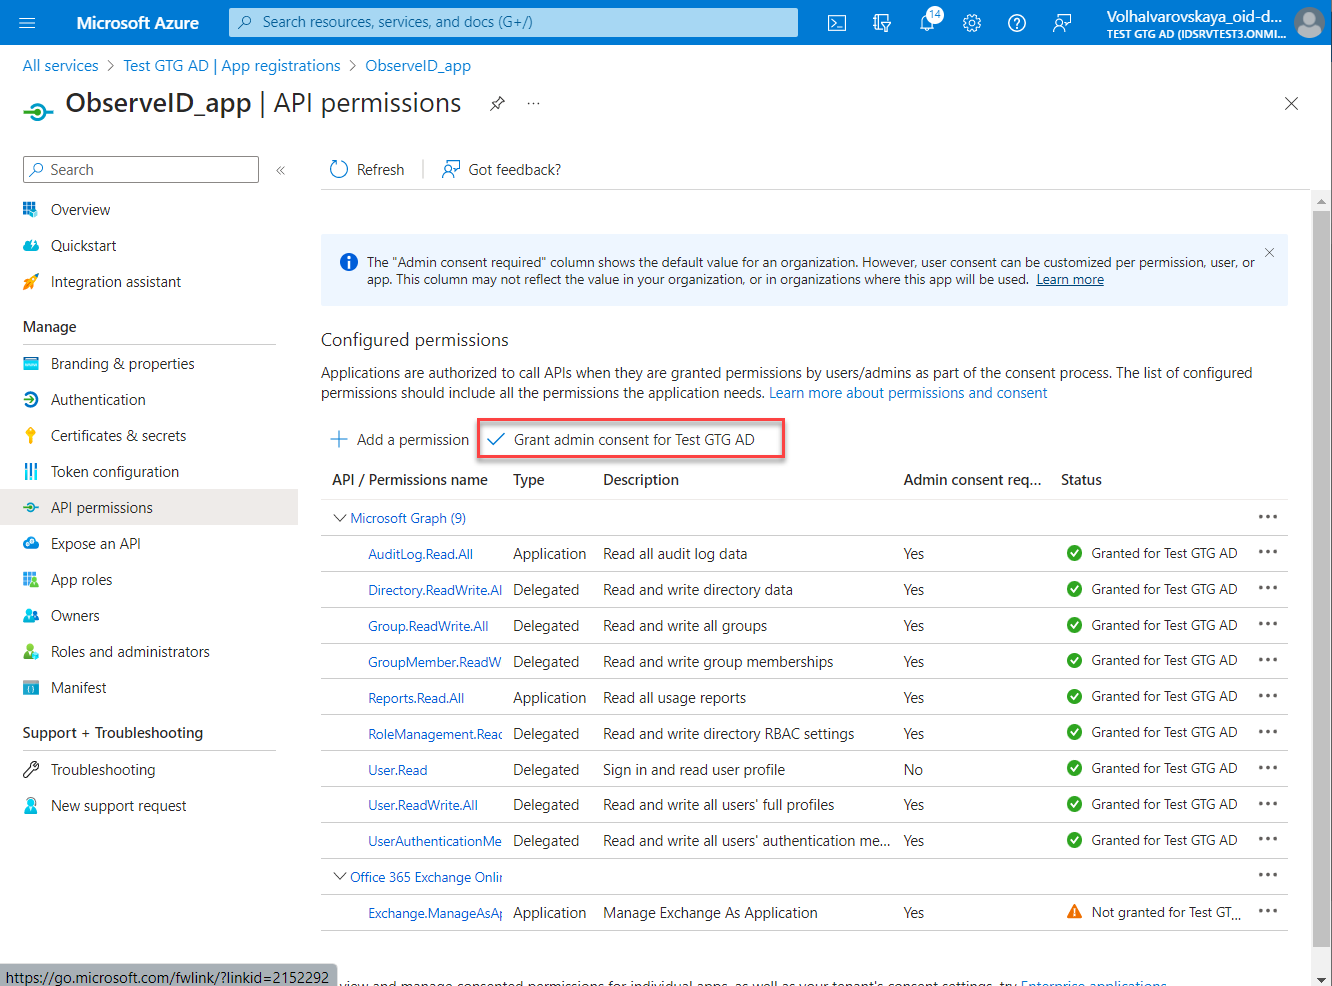
Admin consent
The API permissions added to the registered app in the Azure portal must have the Administrator's authorization. Having received the request for the Administrator Consent, the Administrator needs to approve the permissions added to the app.
Having the privileges of the Administrator, it is possible to give the consent, as follows:
- Open: Azure Portal > All Services > Active Directory > App Registrations > {the registered app} > API permissions
- Click Grant admin consent beside the Add a permission option. As a rule, it is disabled for non-Administrators.
- Confirm the consent in the opened dialog.
Azure RBAC Role
If the Azure integration is expected to pull and\or provision access to the Azure subscription resources, the registered app in the Azure portal needs to be authorized to use the Subscription associated with the Active Directory, as follows:
- Open Access Control (IAM) with one of the following options:
- Subscriptions area, as follows: Azure Portal > All Services > Subscriptions > {a Subscription} > Access Control (IAM)
- Resource Group area, as follows: Resource Group > Subscription > Access Control (IAM)
- Click Add.
- Click Add role assignment.
- Select the required role, according to the minimum permission requirements specified in the Prerequisites part of the Azure AD integration setup.
- Search for and select the registered app as a security principal.
- Click Save.
Azure AD Role
The registered app in the Azure portal needs to be granted an Azure AD Role to use the Active Directory resources, as follows:
- Open: Azure Portal > All Services > Active Directory > Roles and Administrators
- Start to type in the required Azure AD Role, according to the minimum permission requirements specified in the Prerequisites part of the Azure AD integration setup.
- Select the required Azure AD Role among other search results in the Roles grid. And the Assignments page of the selected role opens.
- Click Add assignments. And the Add assignments page opens.
- Click the No member selected link on the Add assignments page. And the Select a member panel opens on the right-hand side.
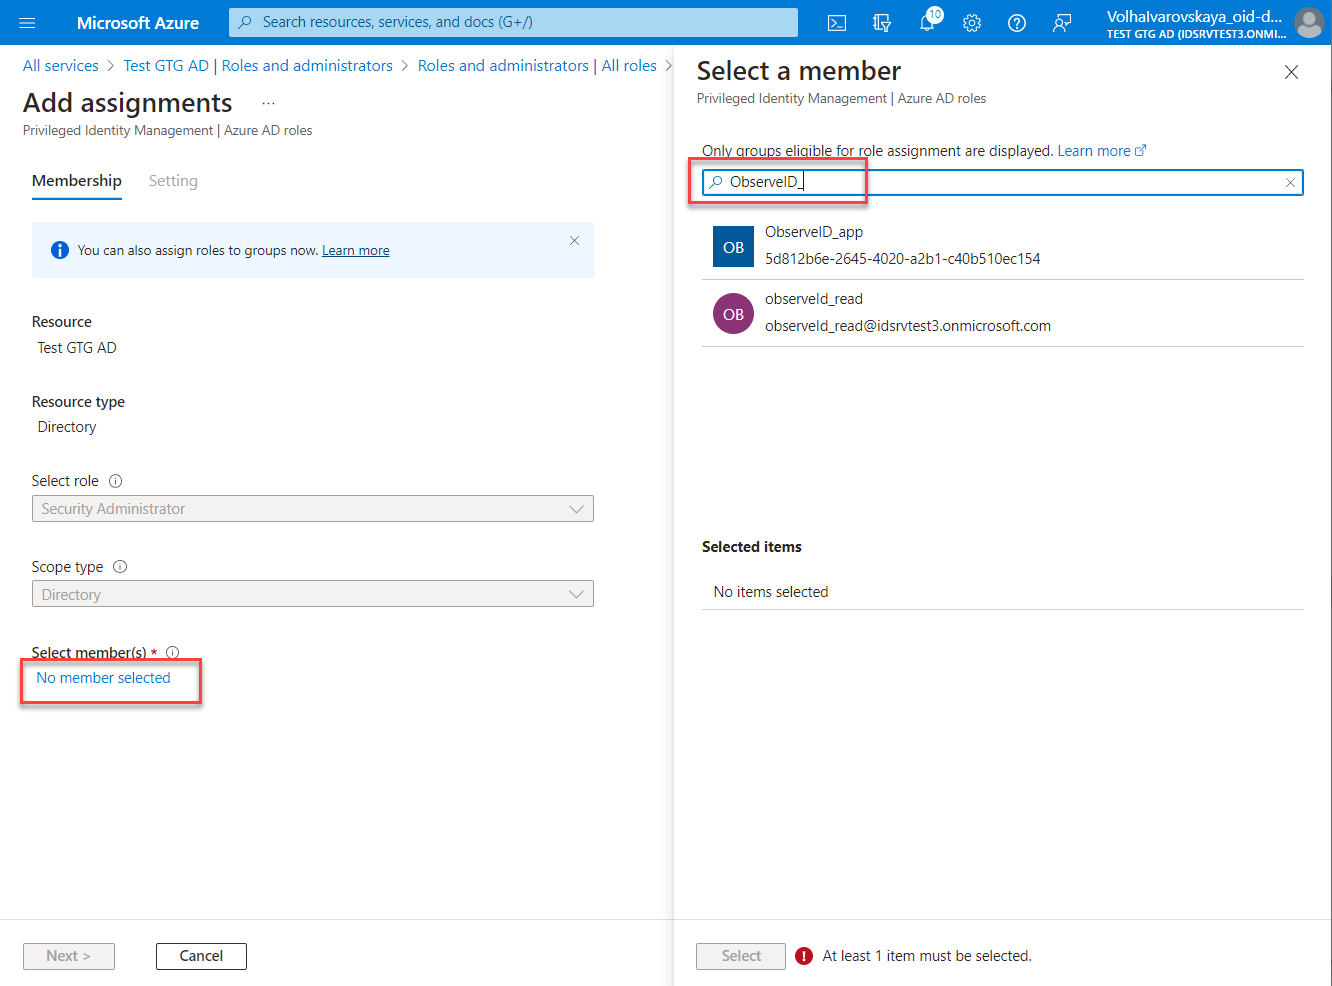
- Enter the name of the registered app, or its Application ID. And then select the registered app in the search results.
- Click Next.
- In the Enter justification field, enter some justification of the assignment of the role to the registered app. Any descriptive text will be sufficient.
- Click Assign.
- Repeat the steps above to add enough Azure AD Roles according to the minimum permission requirements specified in the Prerequisites part of the Azure AD integration setup.
Configuration of Azure AD integration in ObserveID
-
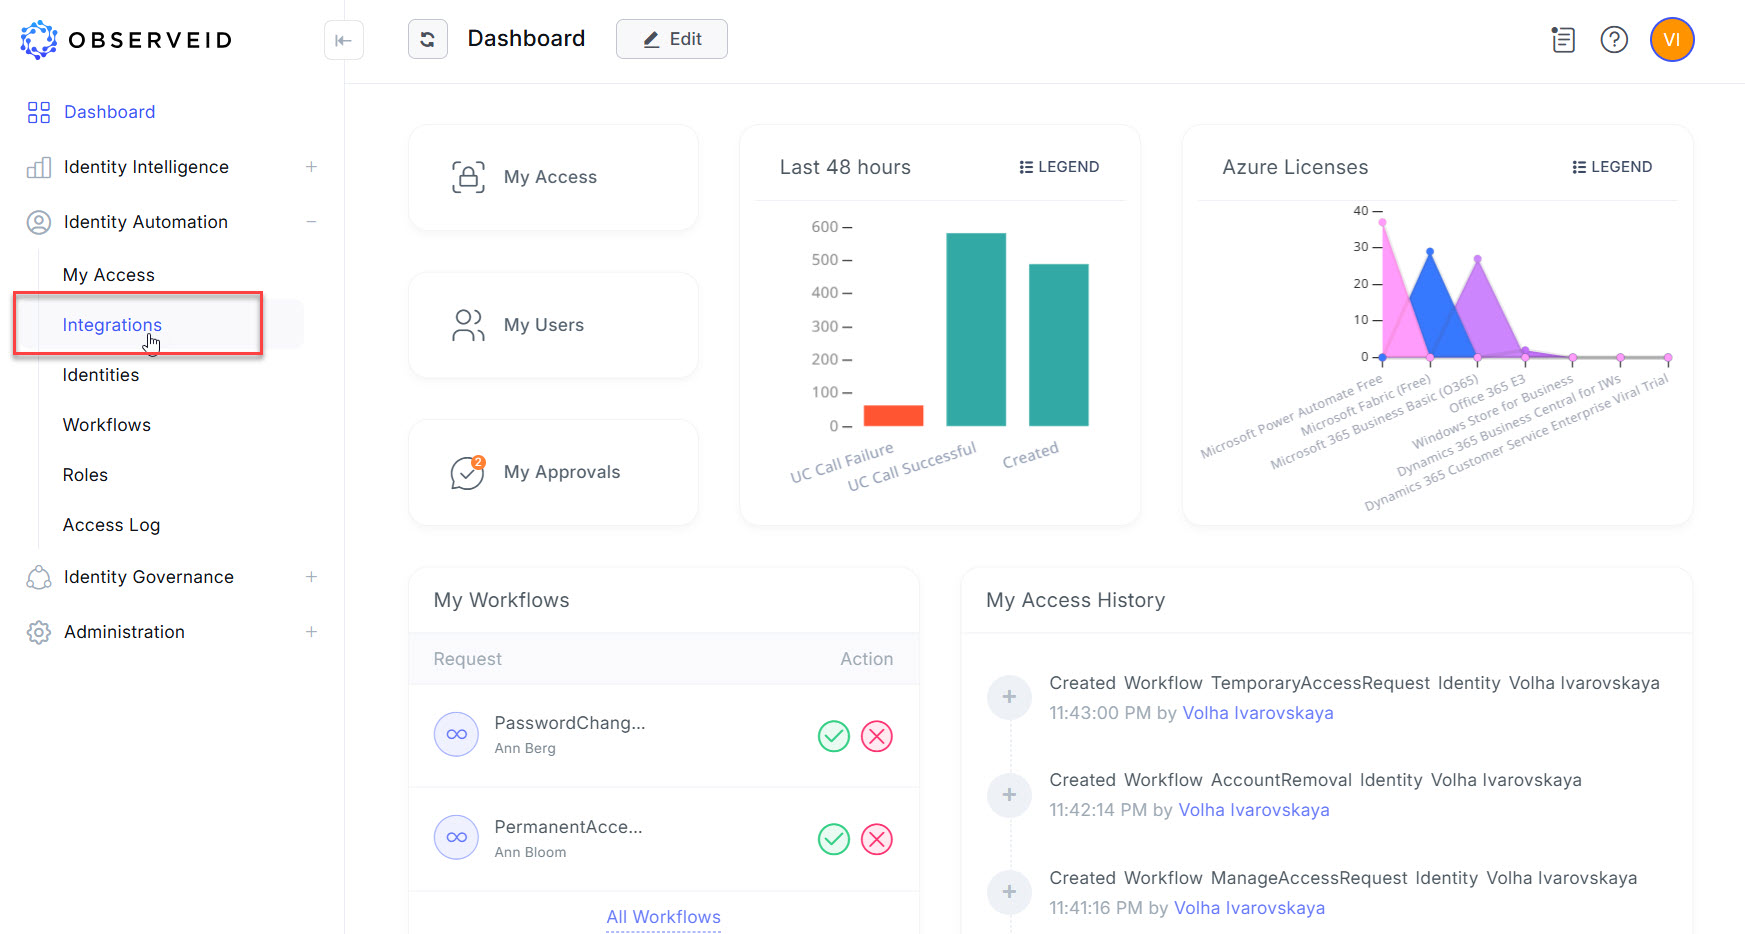
Log in to the ObserveID platform. And the Dashboard is the first page that is opened.
-
Expand Identity Automation and click Integrations in the menu on the left.
-
Click New integration to create a new integration.
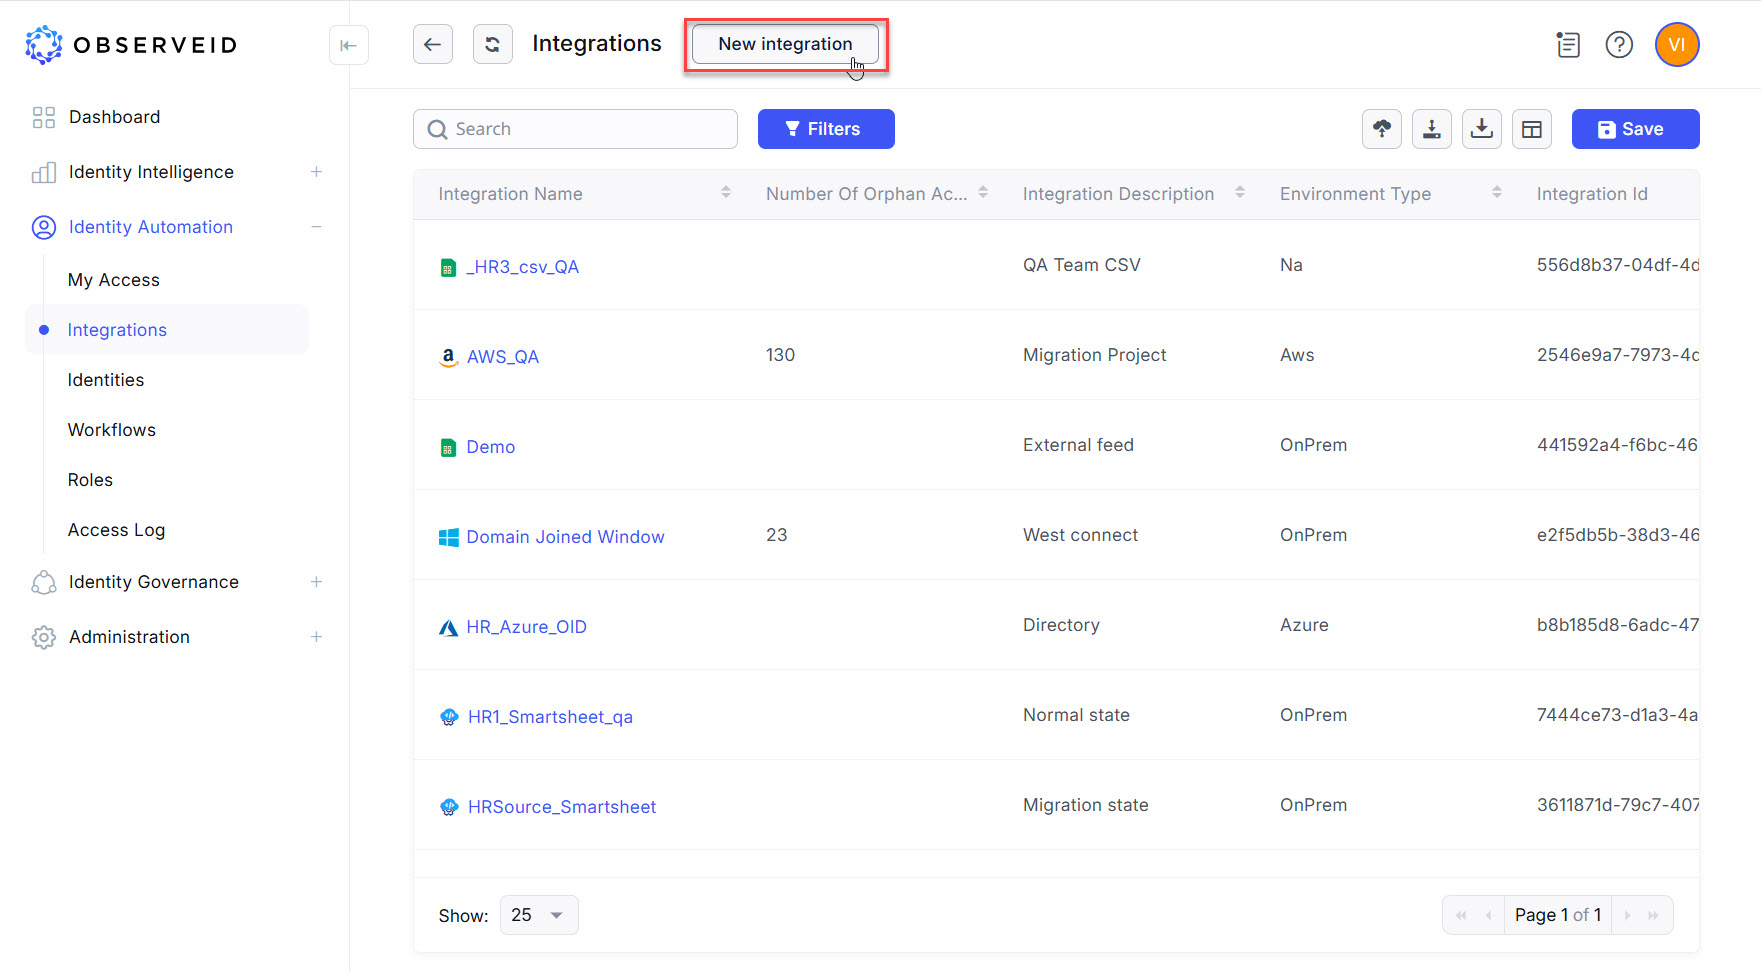
-
Click Azure AD in the opened New integration popup window.
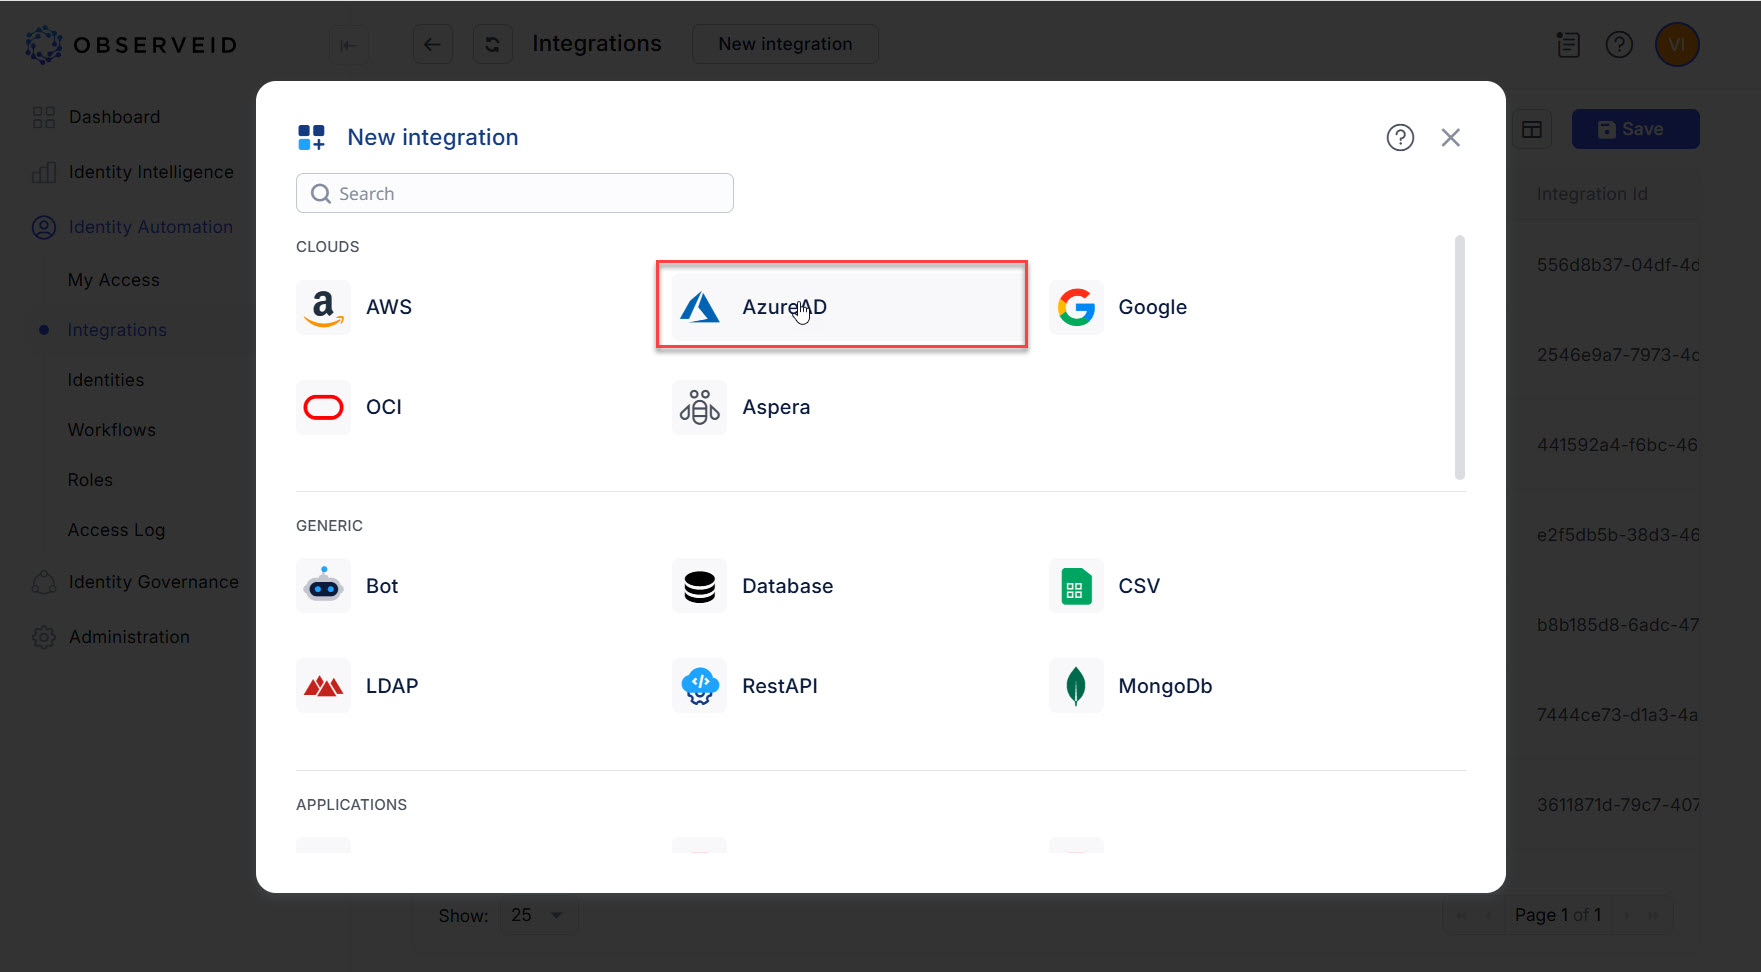
-
Enter a name for the new integration in the opened New Integration - Details window.
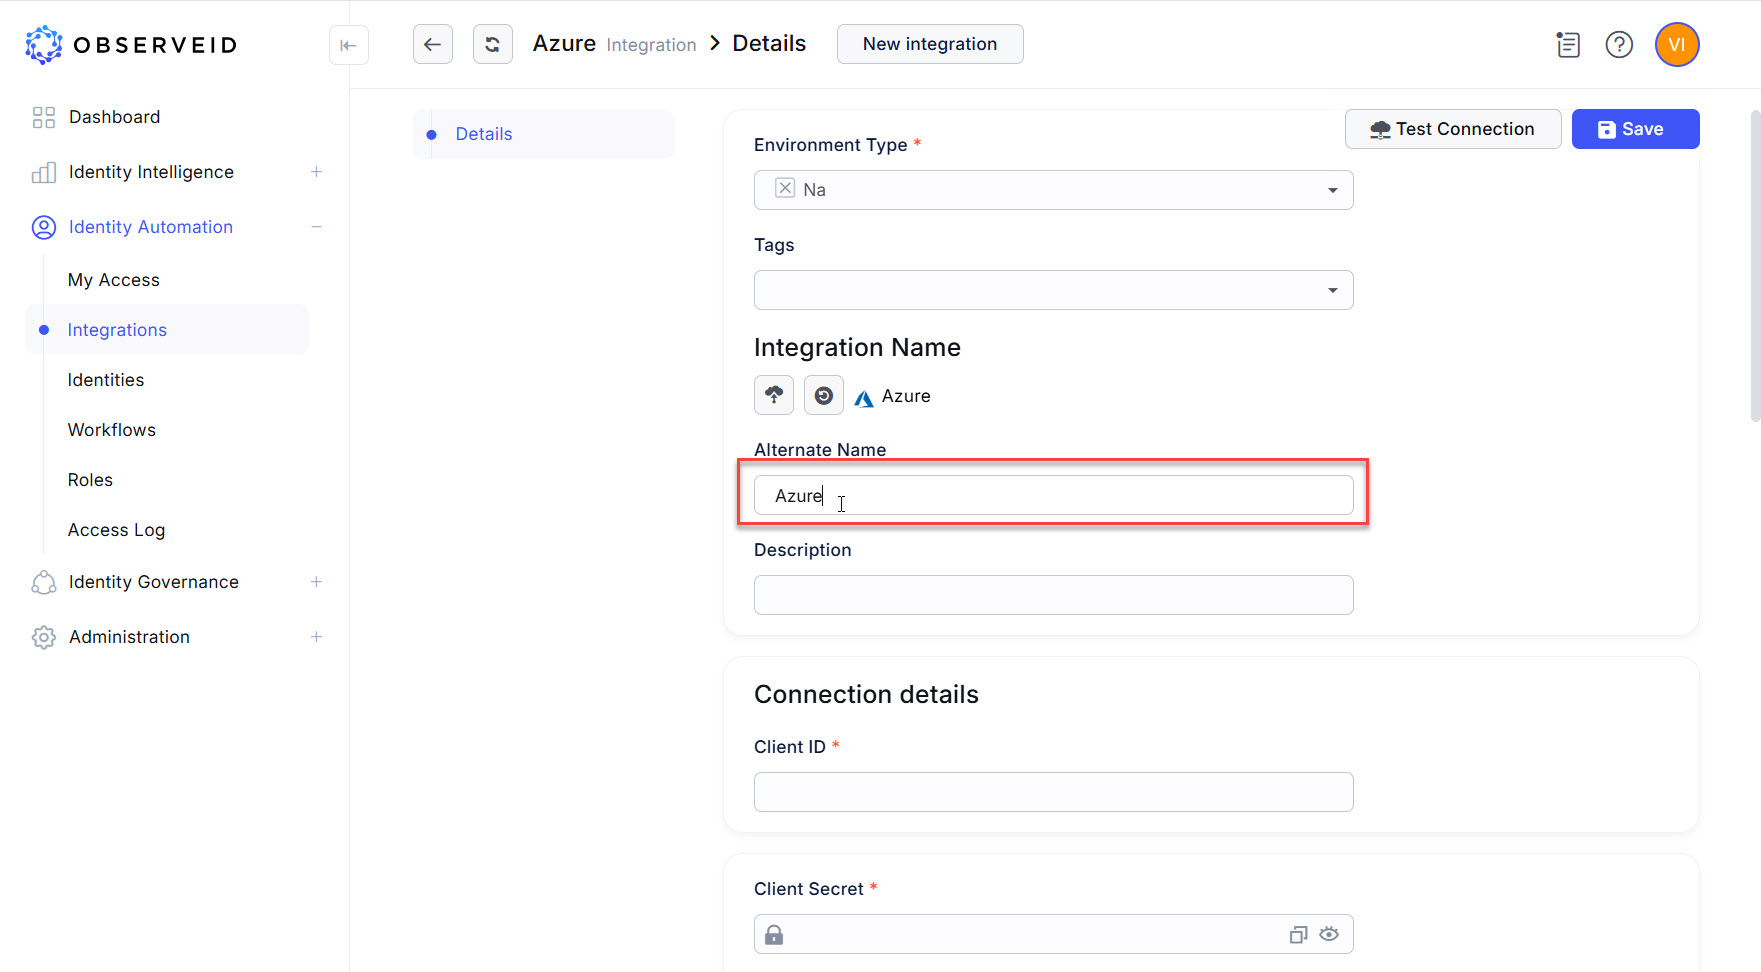
-
Paste the copied Client ID of the application in the Azure portal into the Client ID field in ObserveID.
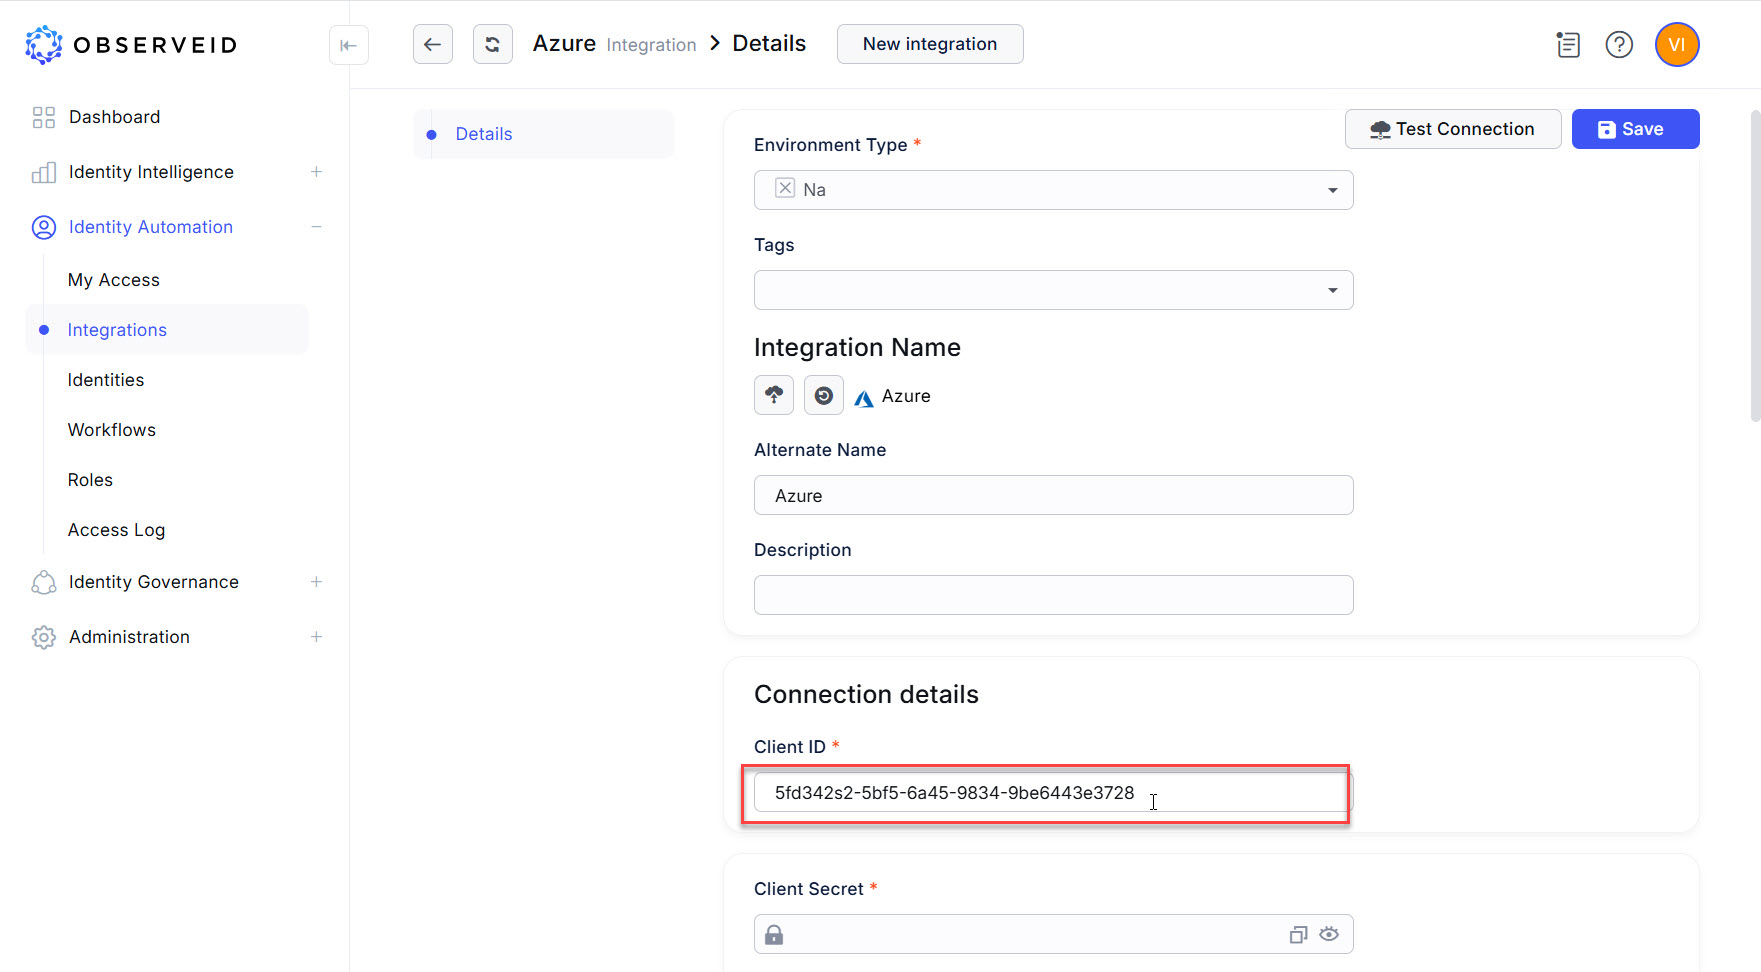
-
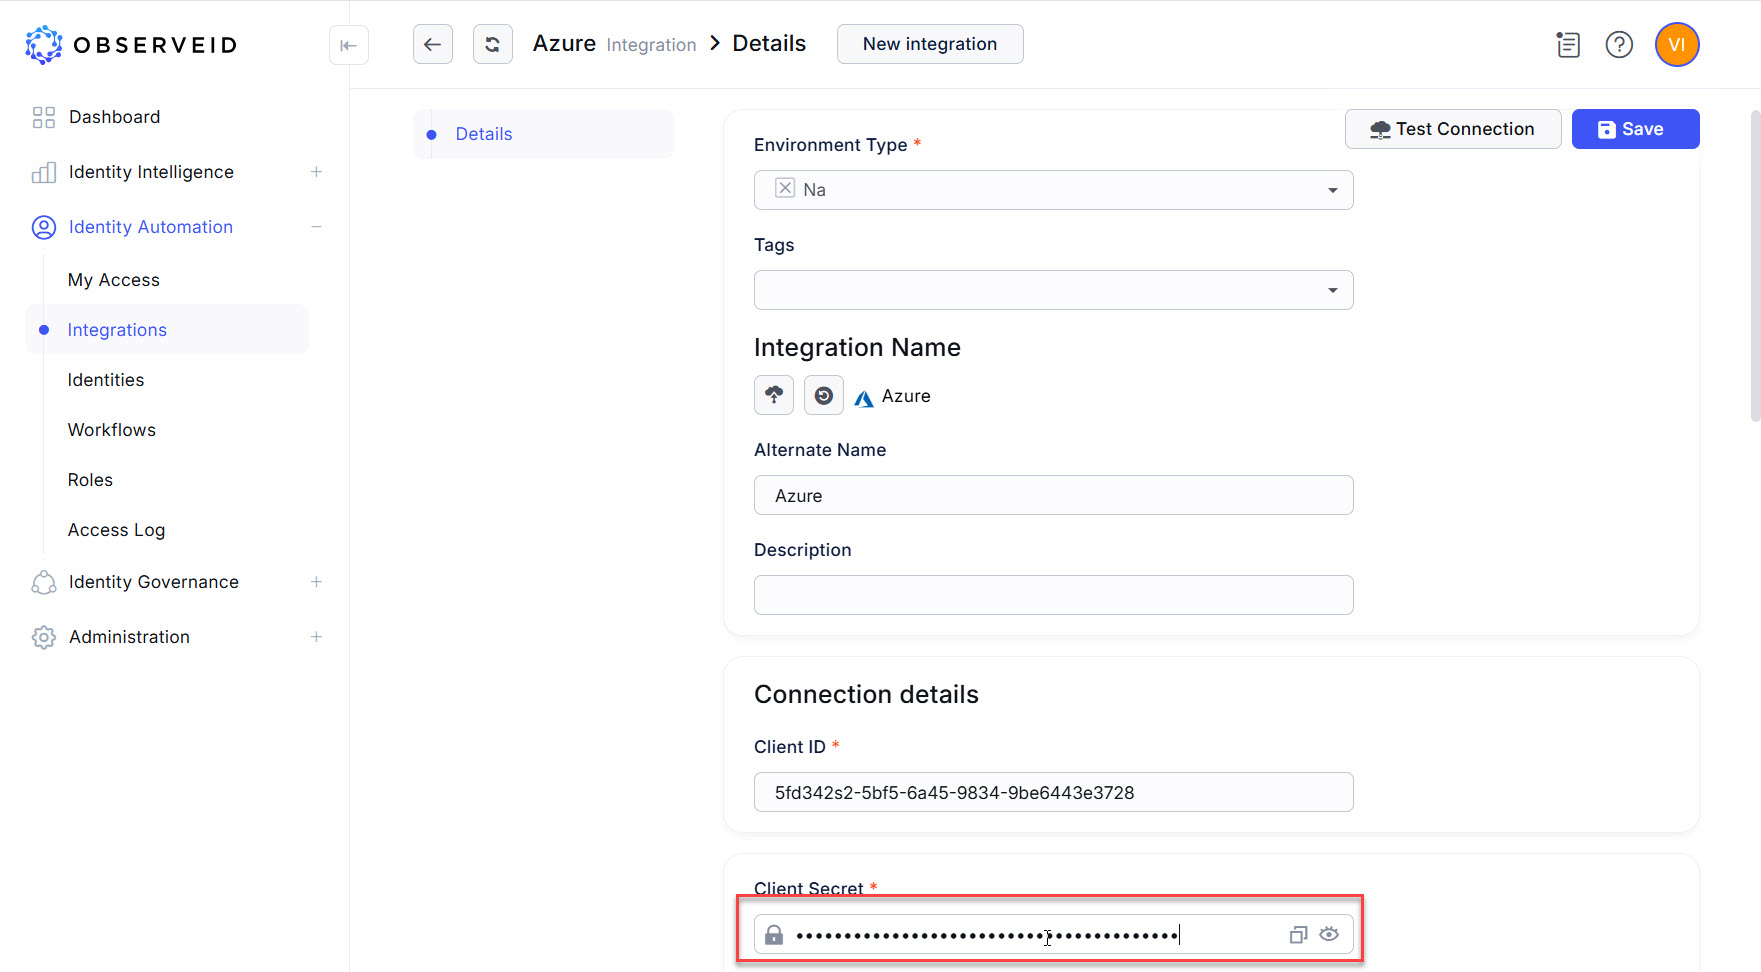
Copy the saved secret value (not the Secret ID) of the application secret when it was generated in the Azure portal.
-
Paste the copied generated for the application in the Azure portal into the Client Secret field in ObserveID.
-
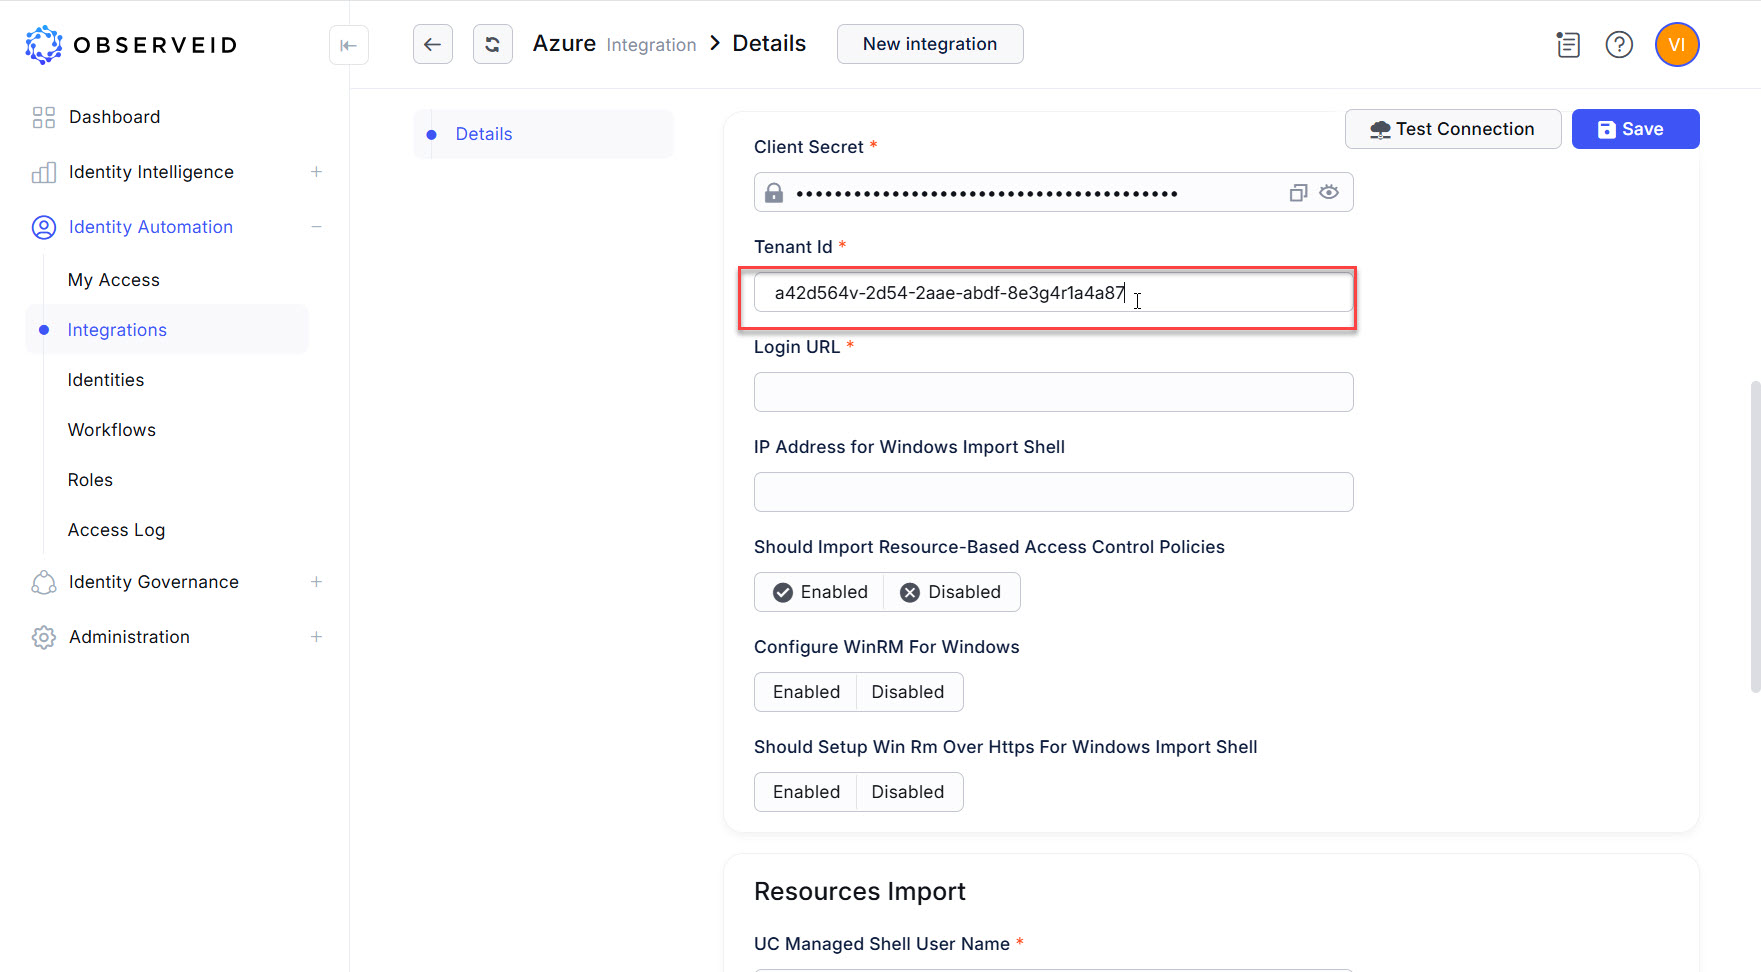
Paste the copied tenant id from the properties of the application in the Azure portal into the Tenant Id field in ObserveID.
-
Enter the URL:
https://portal.azure.comof the Azure portal into the Login URL field.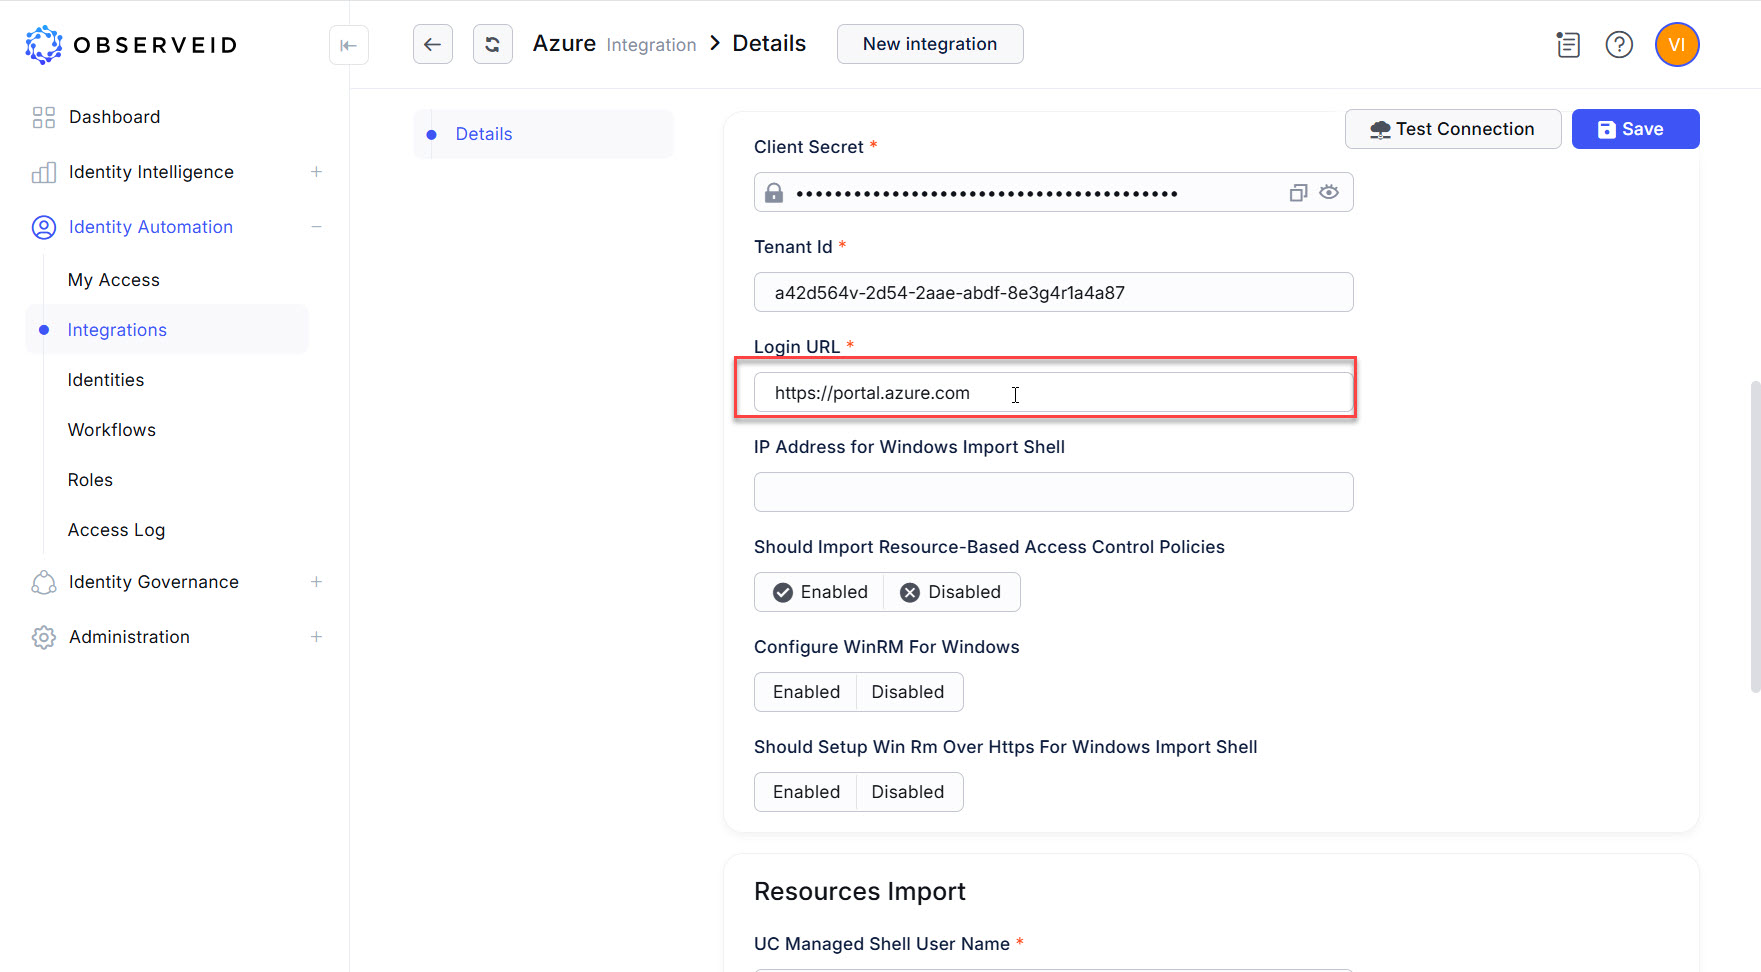
-
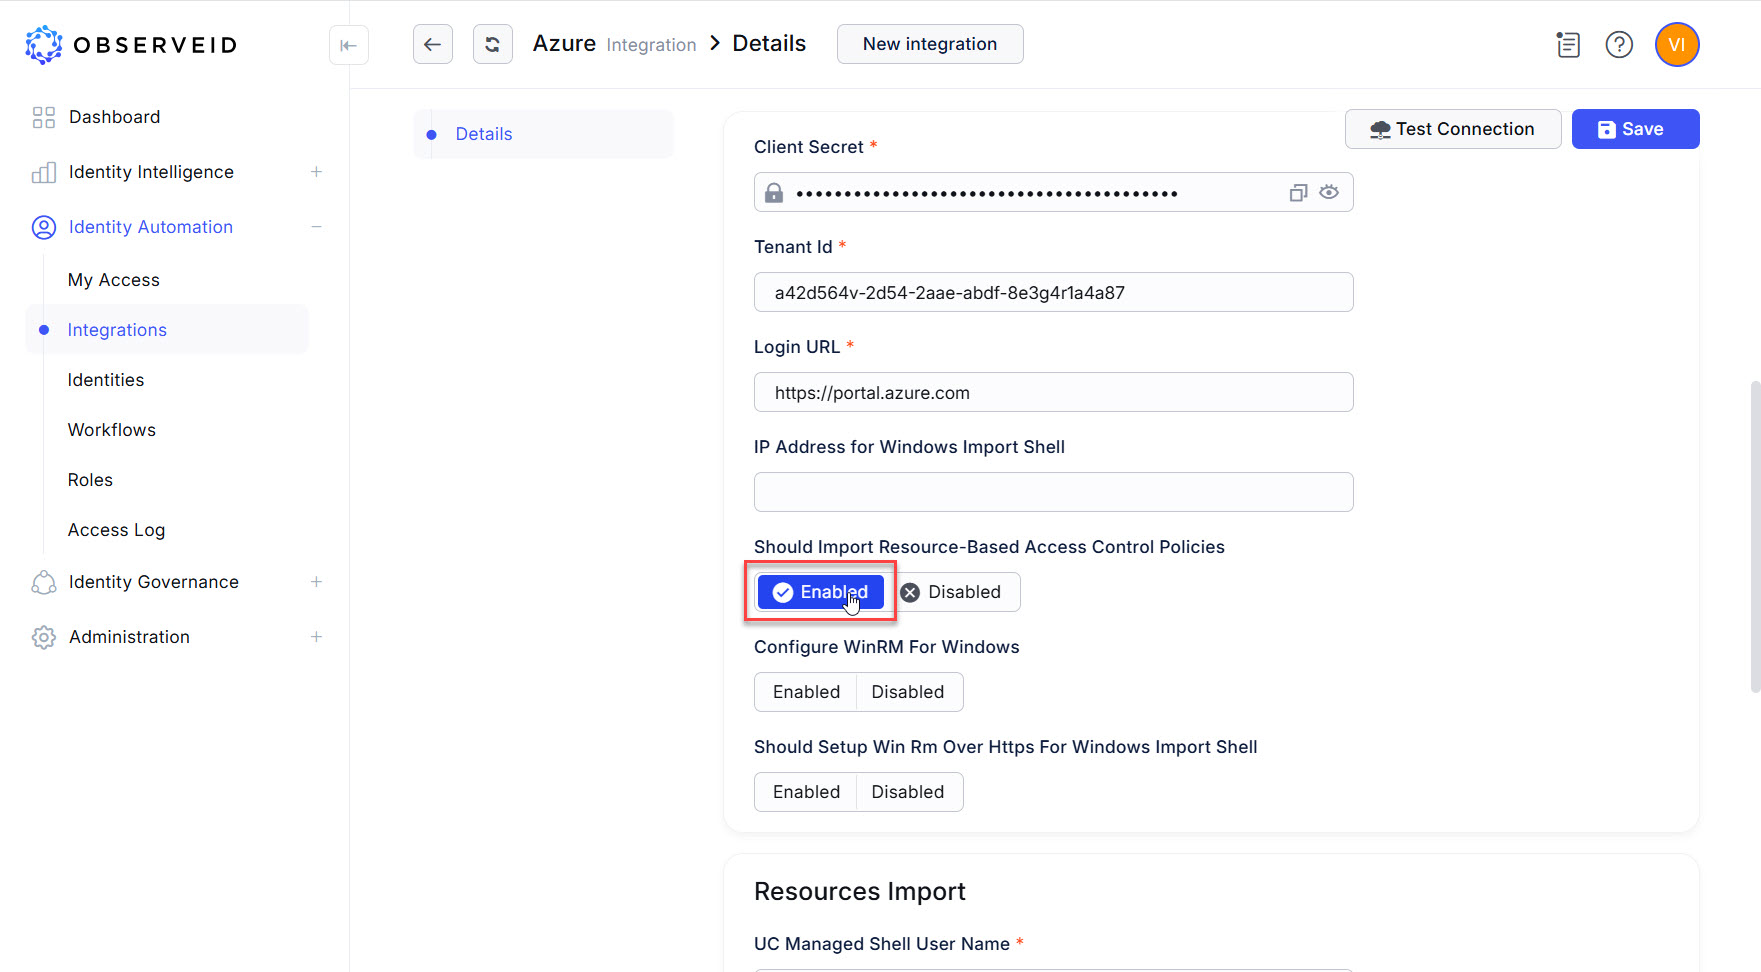
Enable the “Should Import Resource-Based Access Control Policies” toggle if the data import should include the RBAC Roles. If the RBAC Roles are redundant and it is needed to speed up the data import process by reducing the amount of data fetched in each call, select Disabled.
-
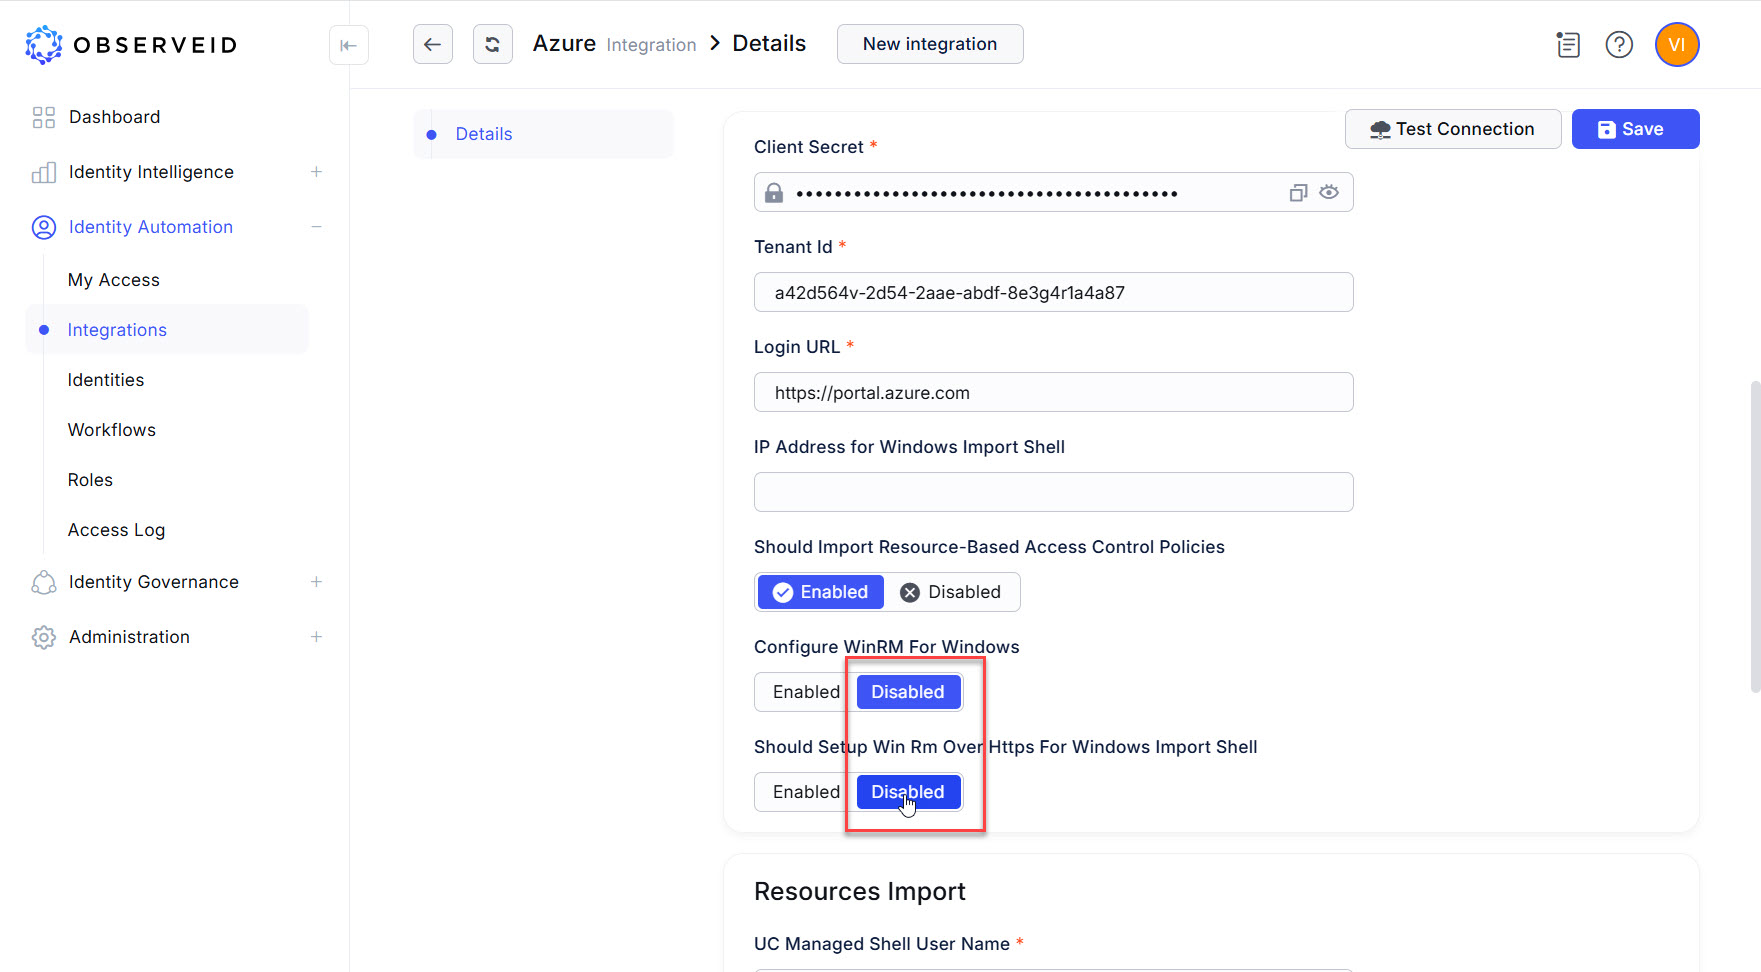
Click Disabled for the following parameters:
-
Configure WinRM For Windows
-
Should Setup Win RM Over Https For Windows Import Shell
It is possible to set up those later, if needed.
-
-
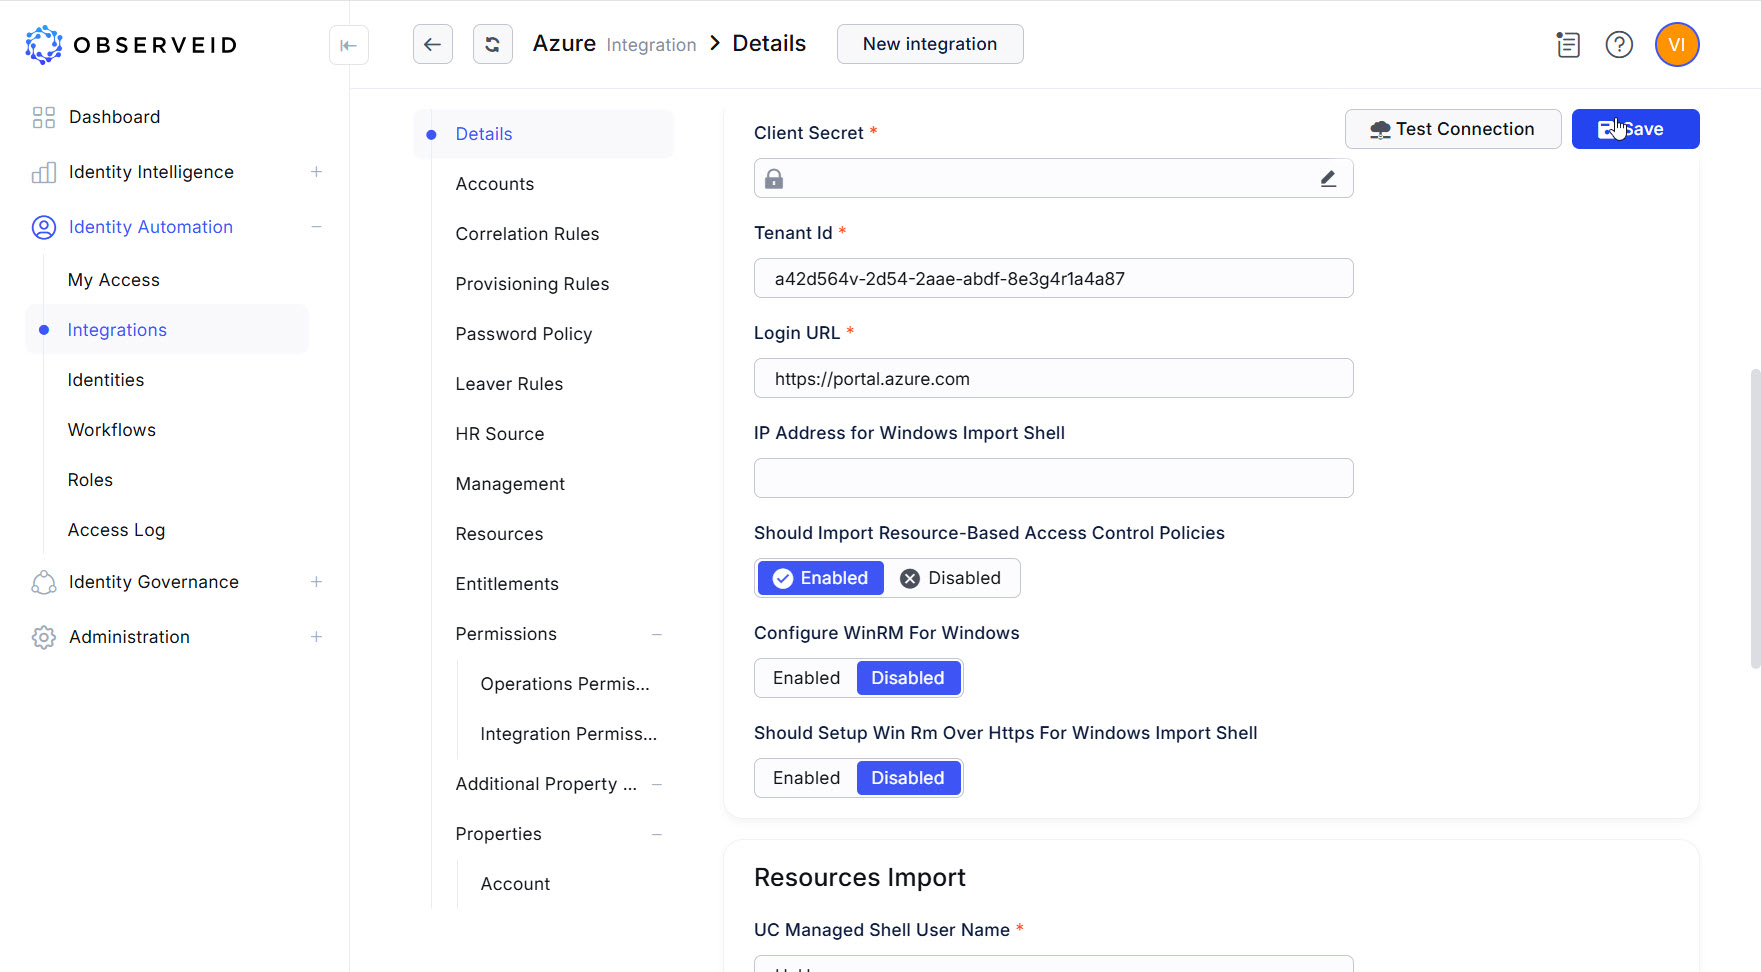
Click Save.
-
Click Test Connection.
If Test Connection finished successfully, go on with the next step, which is the first load of the Integration Data. Otherwise, open Access Log for any details to troubleshoot the connection.
First load of data from Azure AD to ObserveID
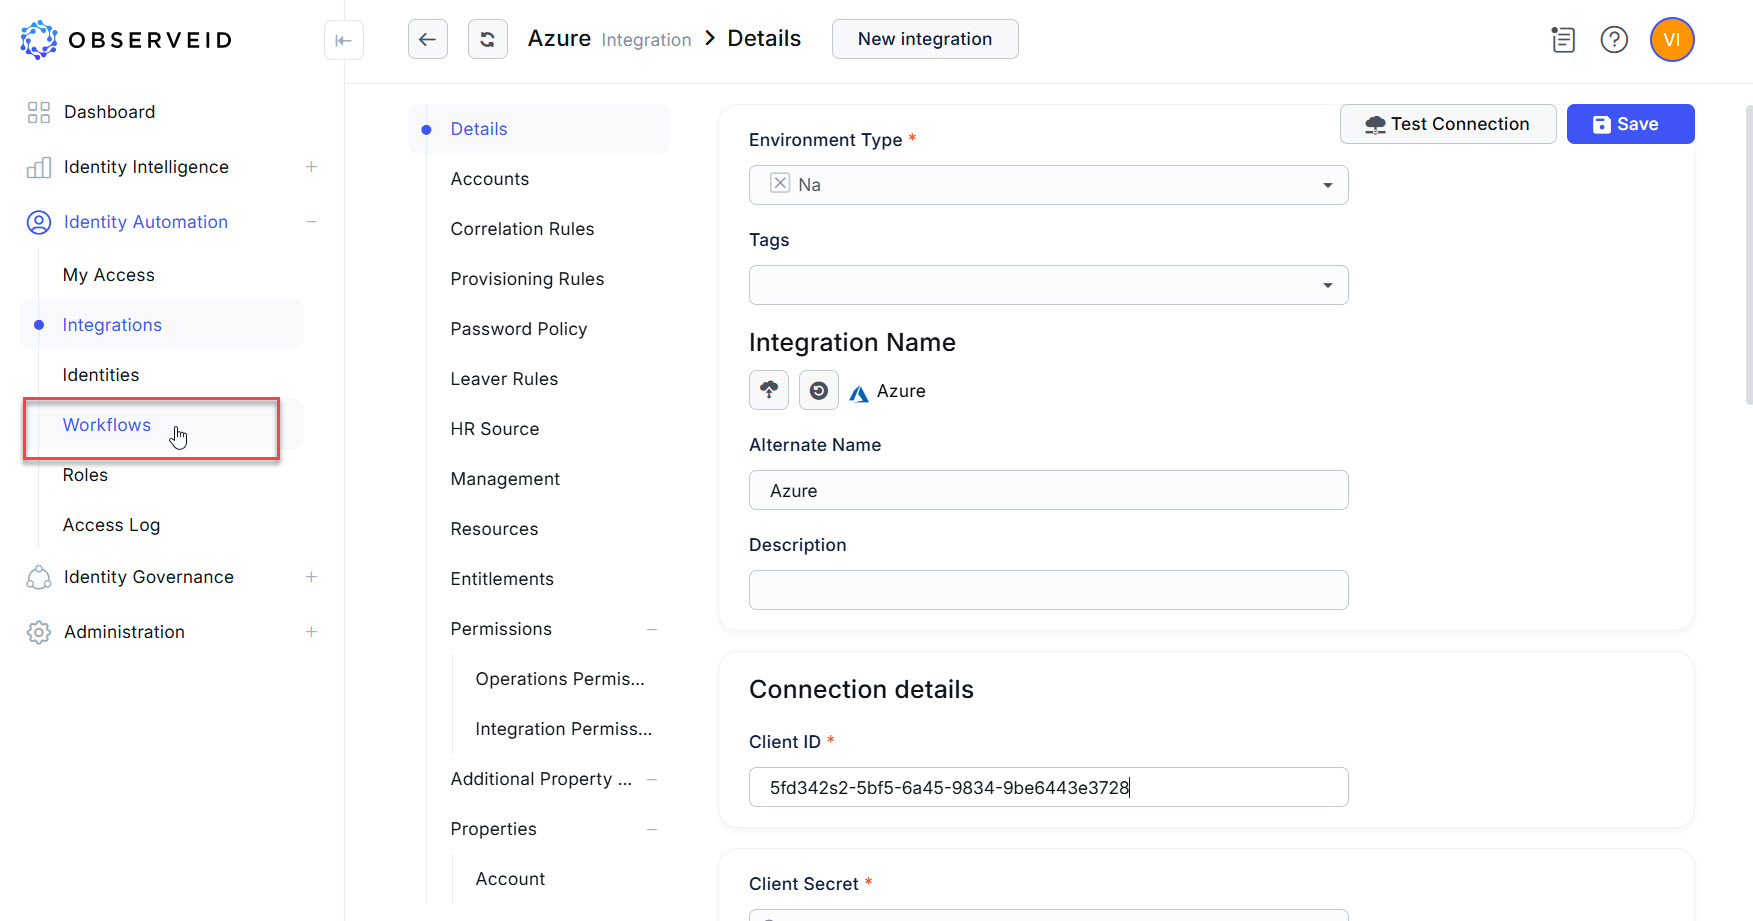
- Click Workflows in the menu on the left.
- Click the Tasks button on the horizontal toolbar.
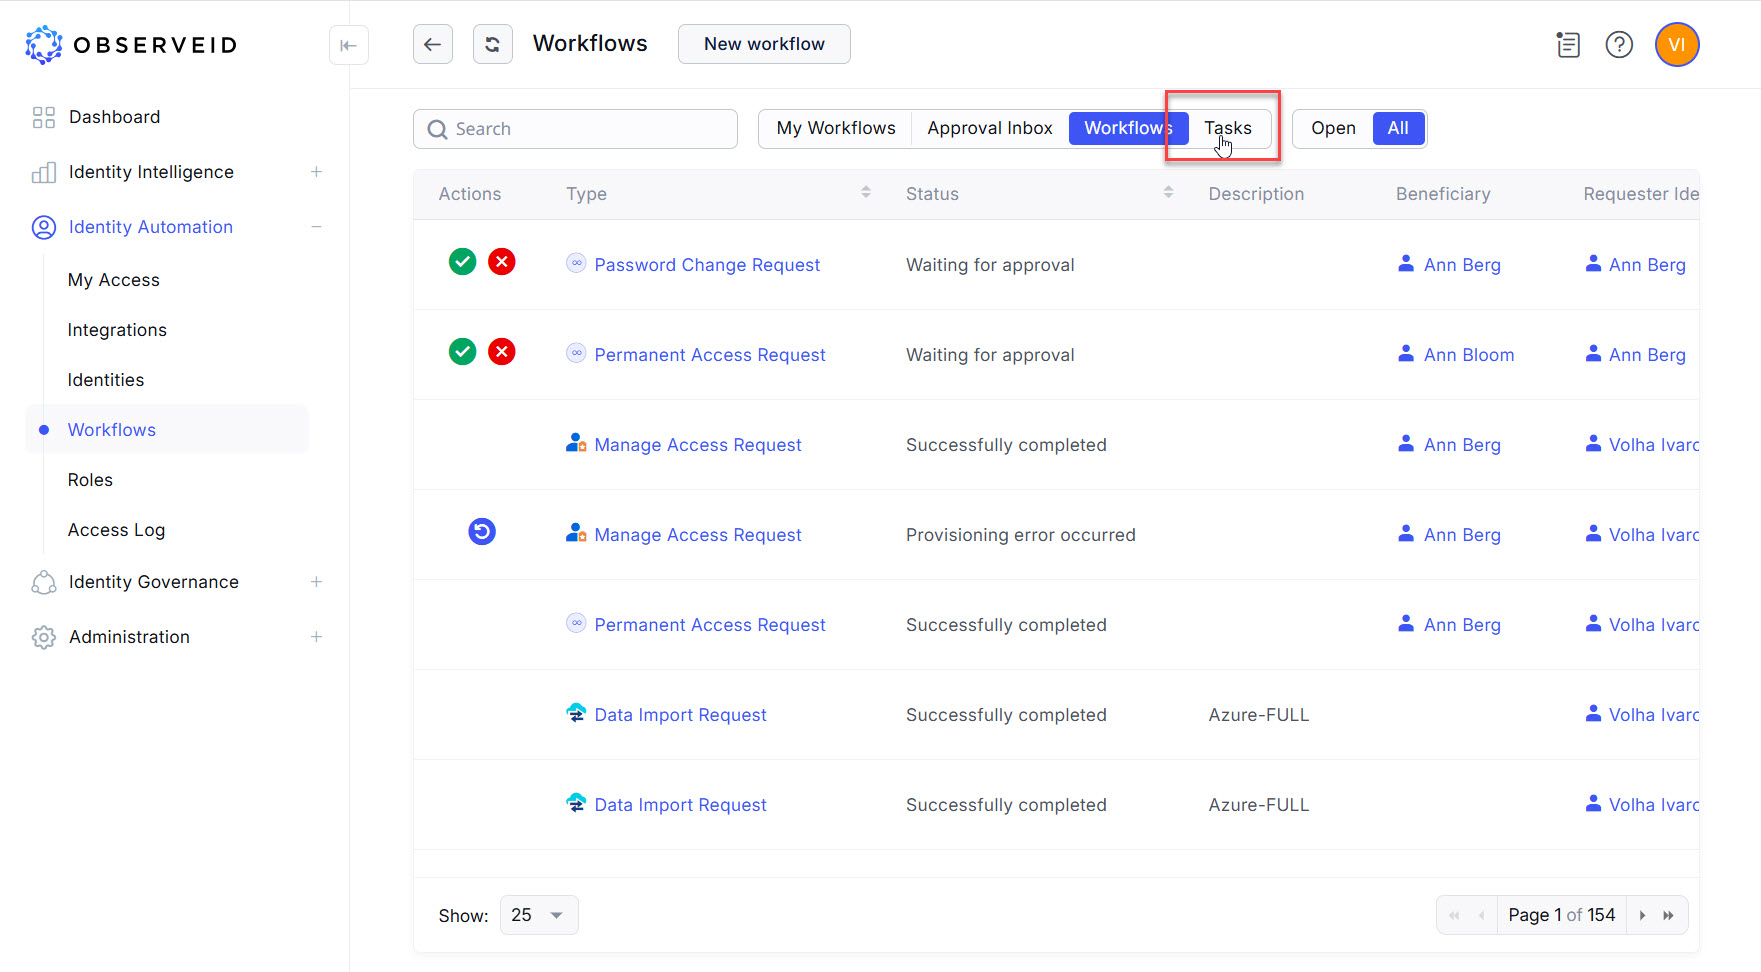
- Click the Trigger icon on the left beside the Data Import task for Azure task where
Azureis the name entered for the new integration.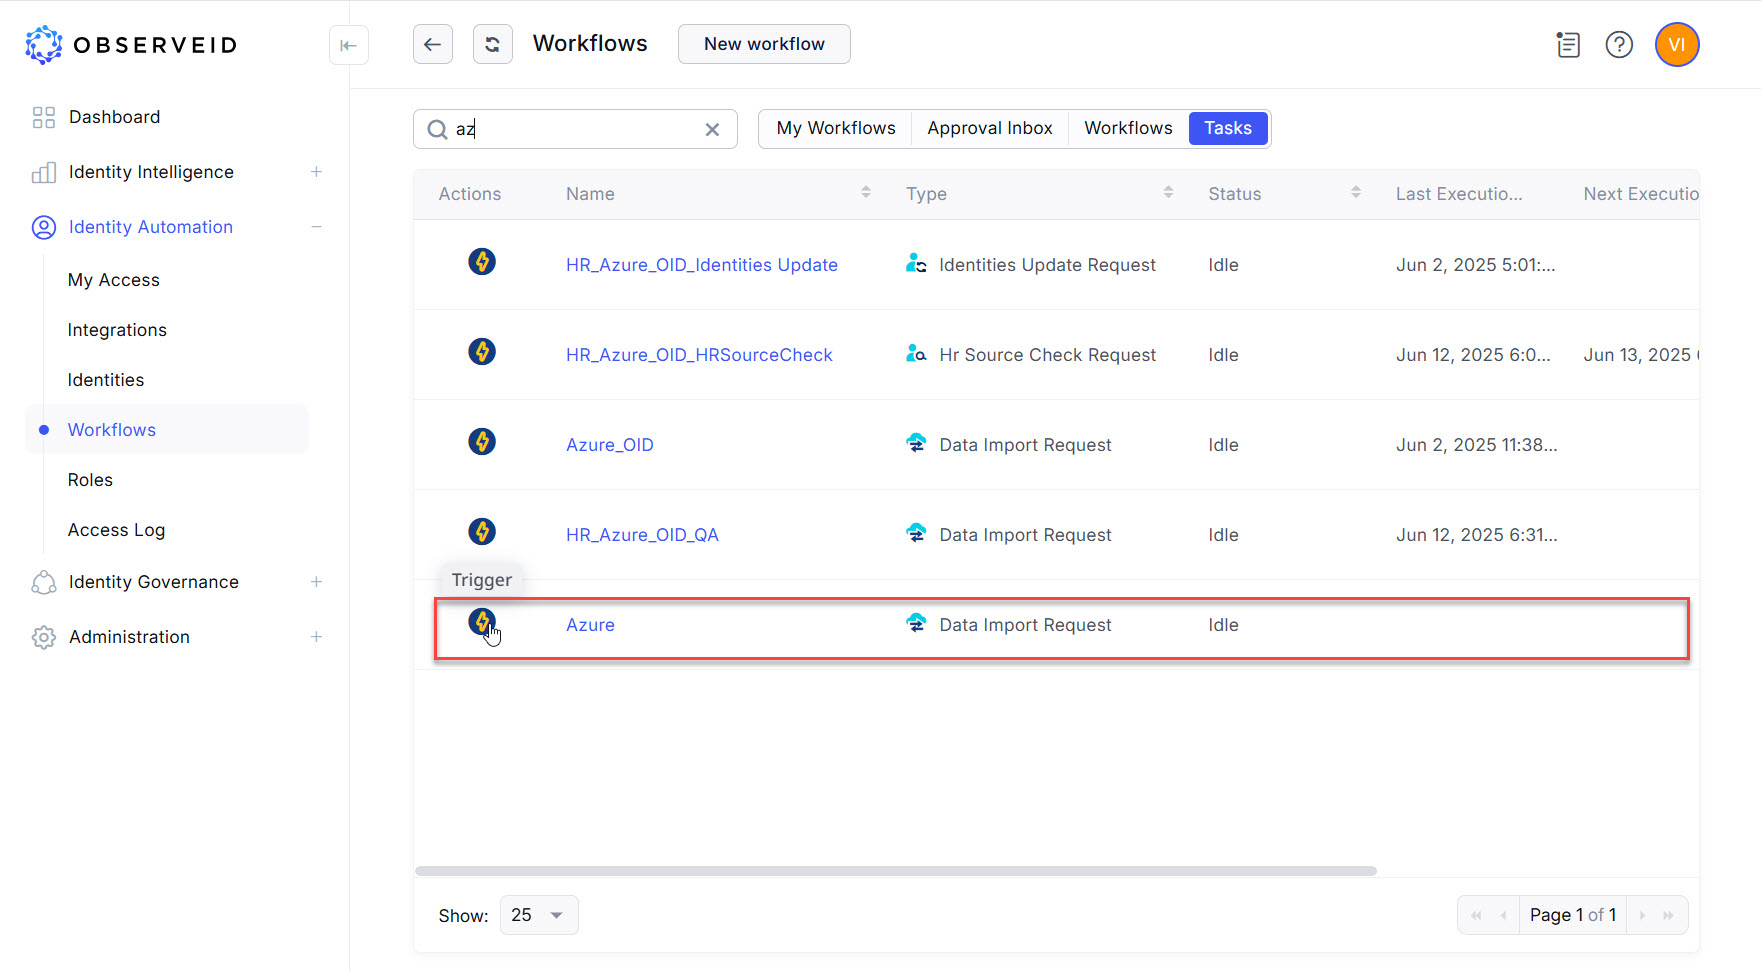
- Click the Refresh button a couple of times until the task will change its status from Triggered to Idle.
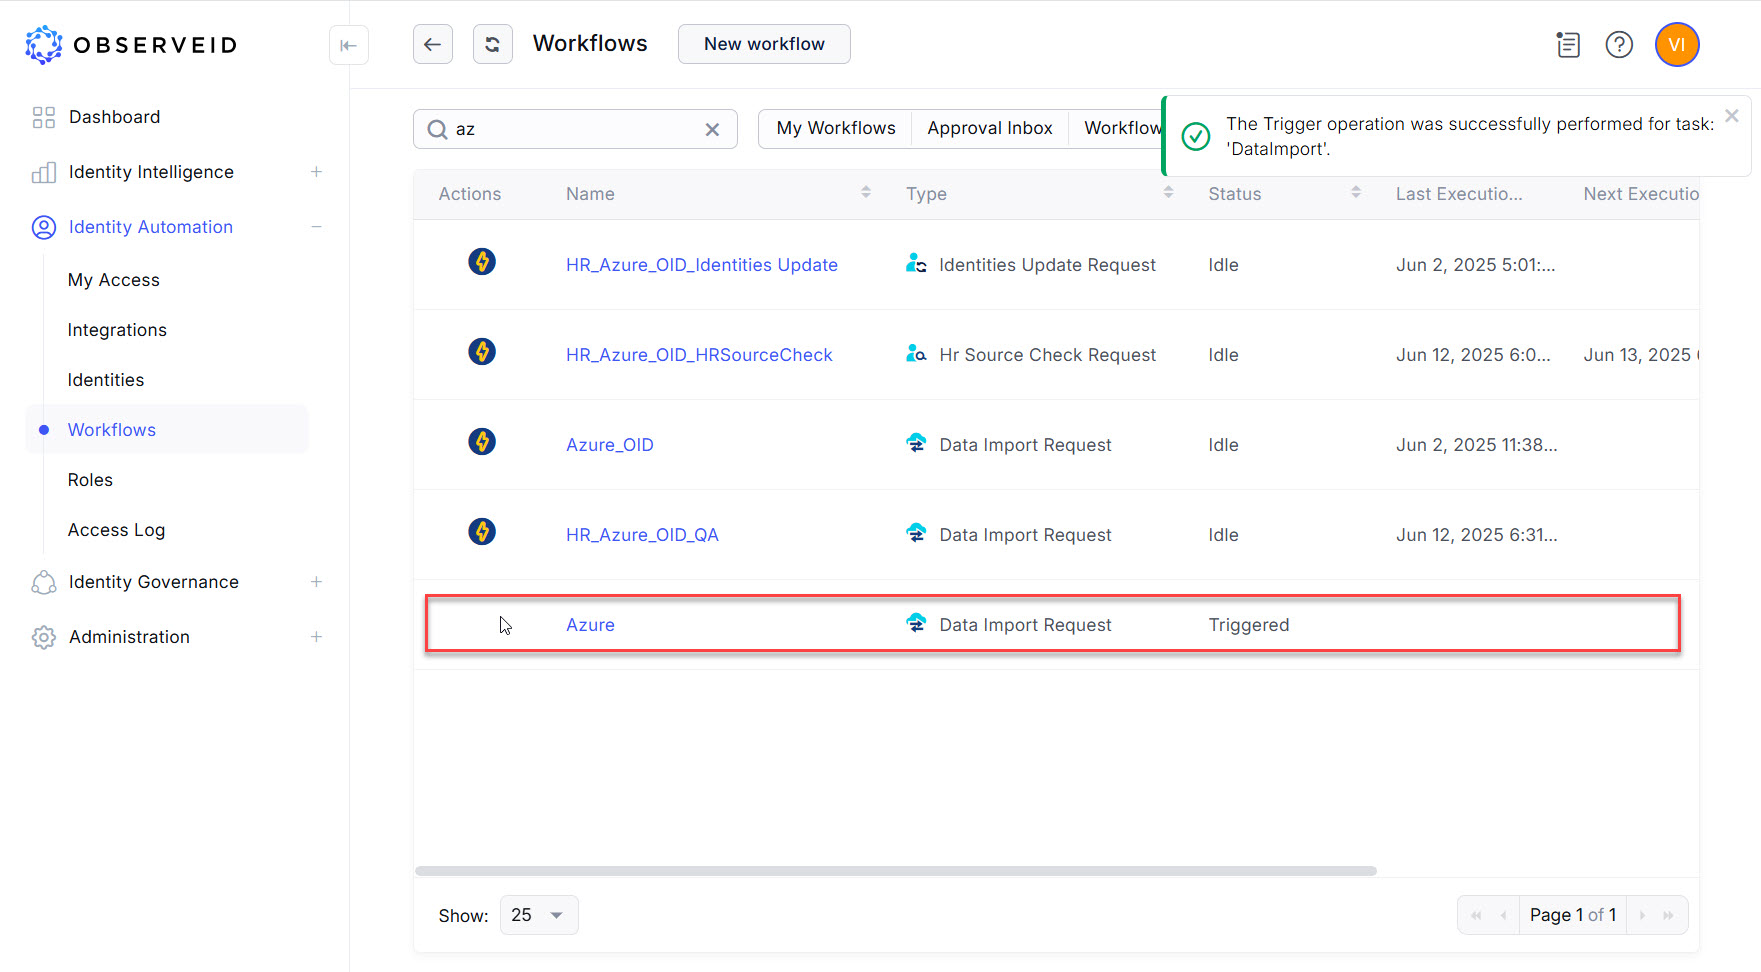
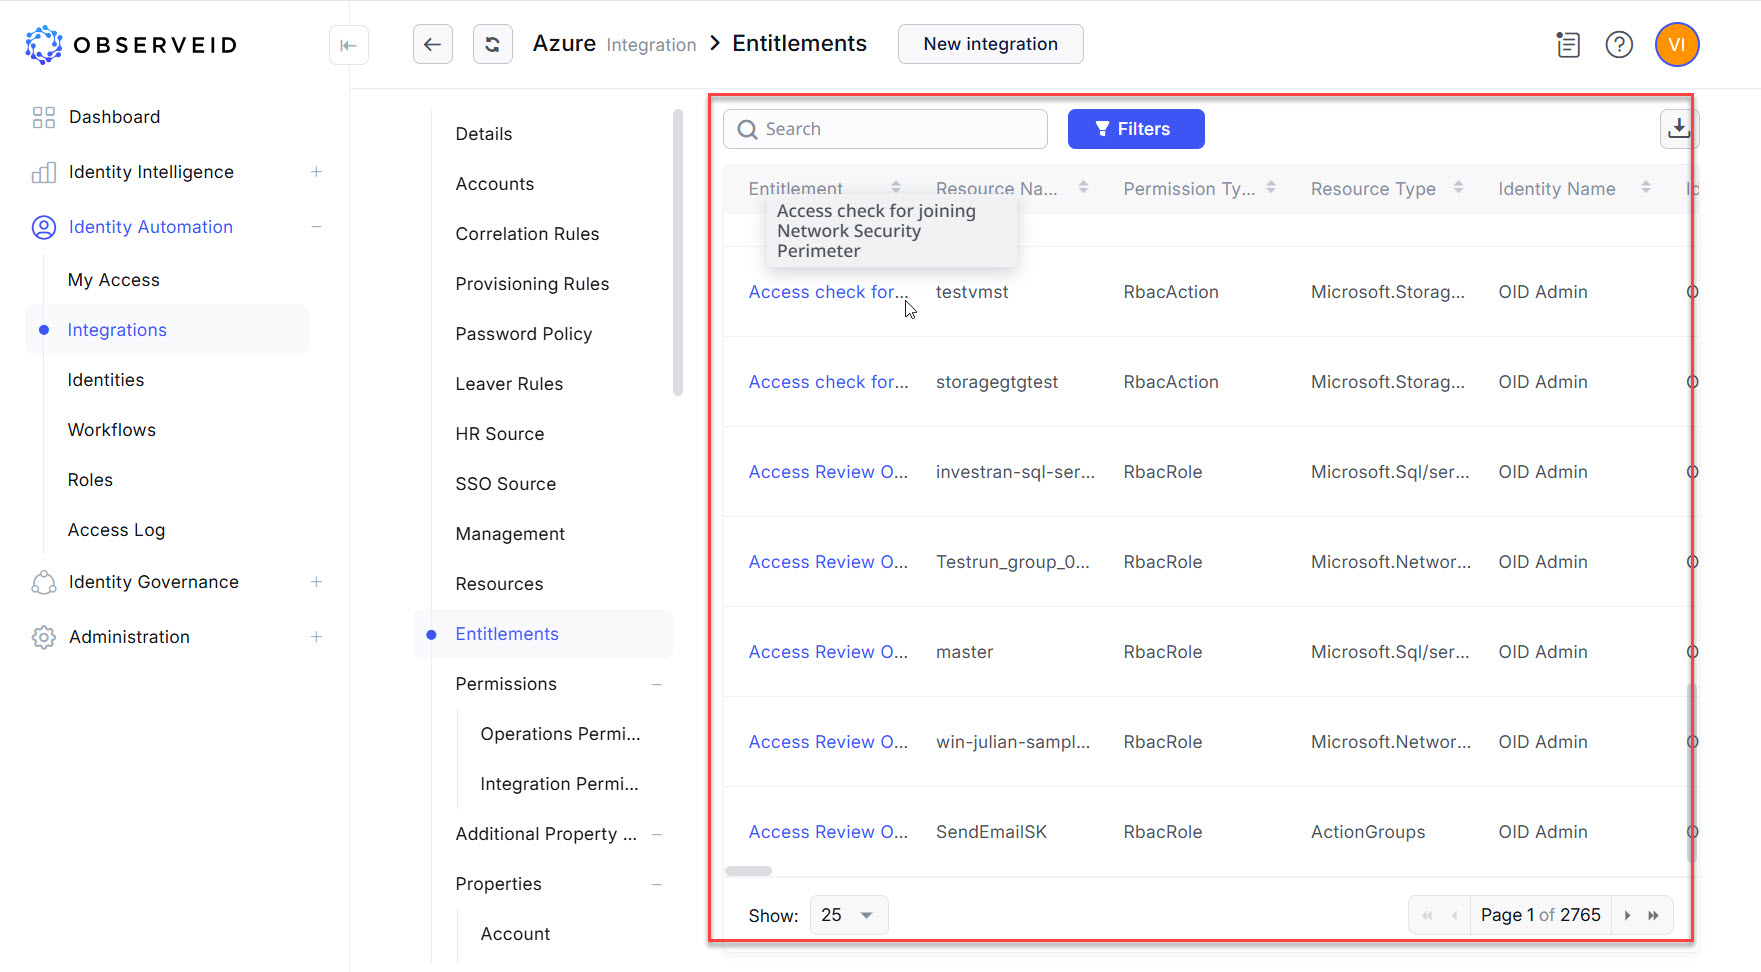
- The successful execution of the Data Import task for Azure should transfer data from the Azure platform to the ObserveID platform. To verify that the data has been successfully imported, return to the integration details in the Integrations area. Check that the options in the second left-hand menu, such as Accounts, Resources, Entitlements, and Properties show the integration data.