Create a role
A role is created with the Role Creation Request workflow. To launch the workflow, do the following:
-
Use one of the following options to initiate a Role Creation Request workflow:
-
click New Role in the Roles area;
 New Role button in the Roles area
 -
or click New Workflow in the Workflows area and then select Role Creation from the opened New Workflows popup window.
 New workflow button in the Workflows area
-
-
The Role Creation Request workflow opens.
-
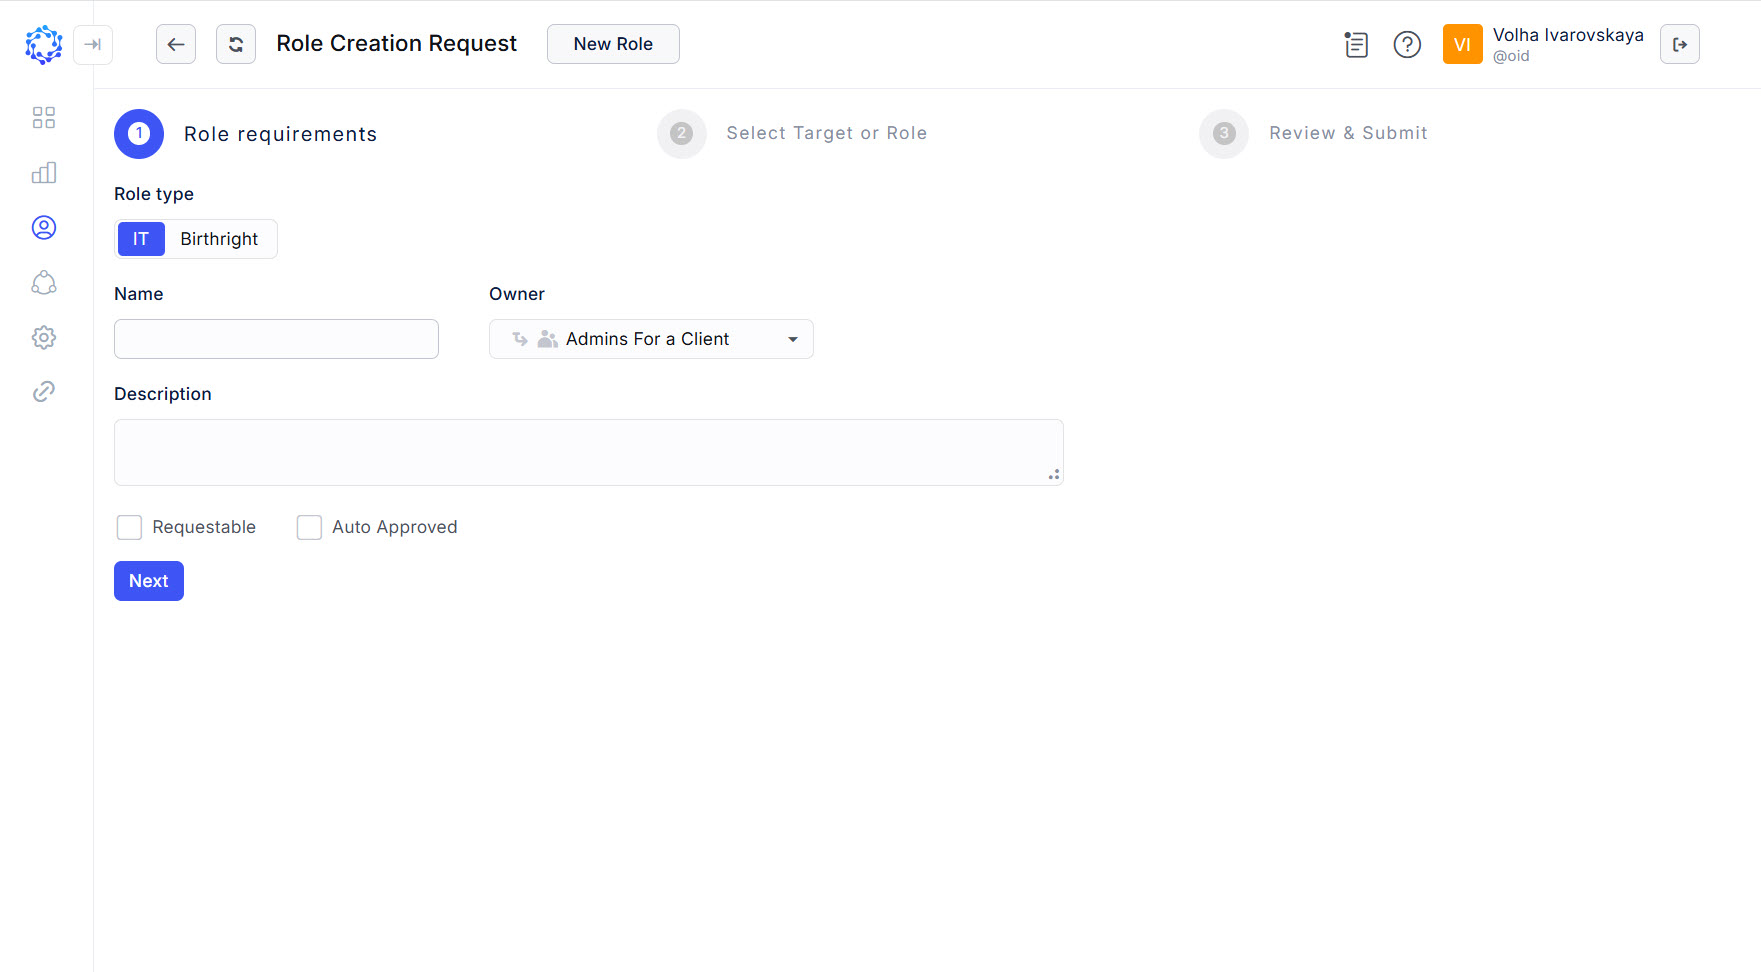
Fill out the following details about the new role:
-
Select IT, or Birthright.
An IT Role, or a Birthright Role are the two types of a role. The provisioning of an IT Role to an Identity is determined by the administrator. The provisioning of a Birthright Role to an Identity is conditional and determined by the system.
-
Enter Name and Description.
It is a user-determined display name and description for the new Role.
-
Select Owner.
The Owner dropdown list provides one of the options for selection: an Identity, or a Workgroup, or the Default Approver. In case of the Default Approver, it is established in: Company Administration > Workflows > Workflow Settings > Default Approver.
The selected Owner would be an approver of the role assignment, in case if during the approval process, the approval of the Role owner would be requested.

-
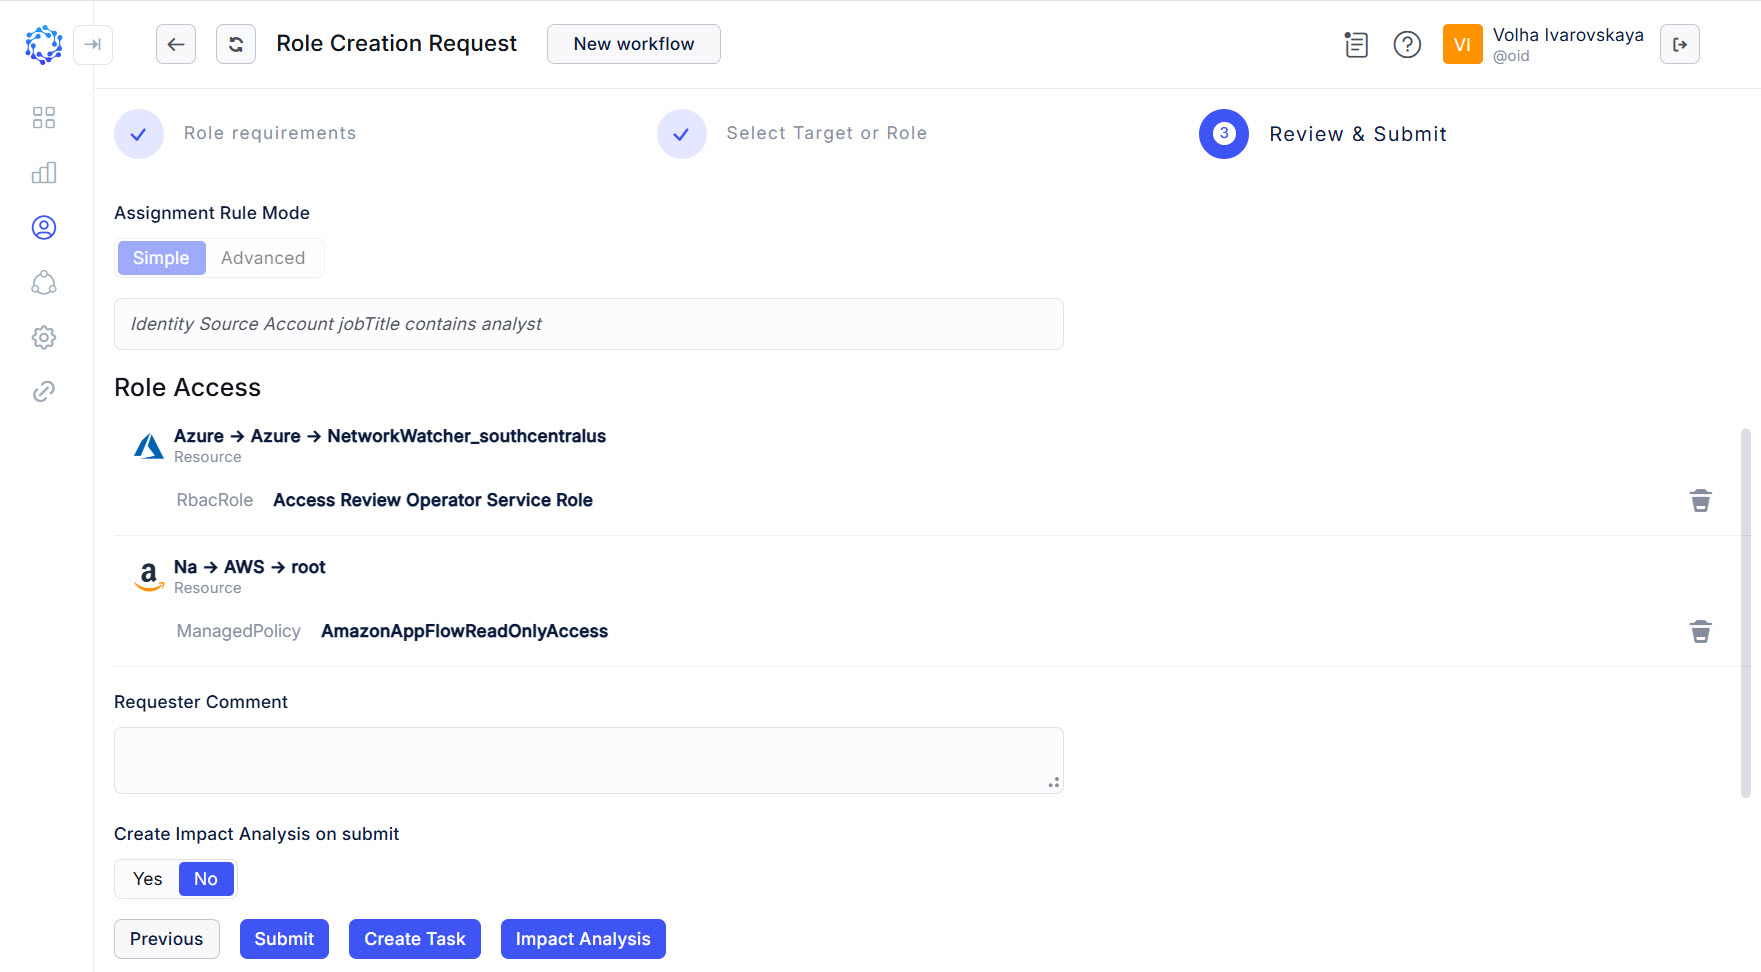
In case of the Assignment Rules of a Birthright Role, there are two options:
- to set a rule with the Filters, select Simple;
- to set a rule by coding it in the C# language, select Advanced.
The Assignment Rules establish the condition for the Role of the Birthright type.
-
In case of an IT Role, check if it it Requestable.
The enabled Requestable option makes the role available for selection by the user on a workflow form.
-
If needed, check Auto Approved.
If checked, the approval will be bypassed whenever the role is provisioned, updated, or deleted.
-
Once done, click Next to move to the next step of the role creation wizard.
-
-
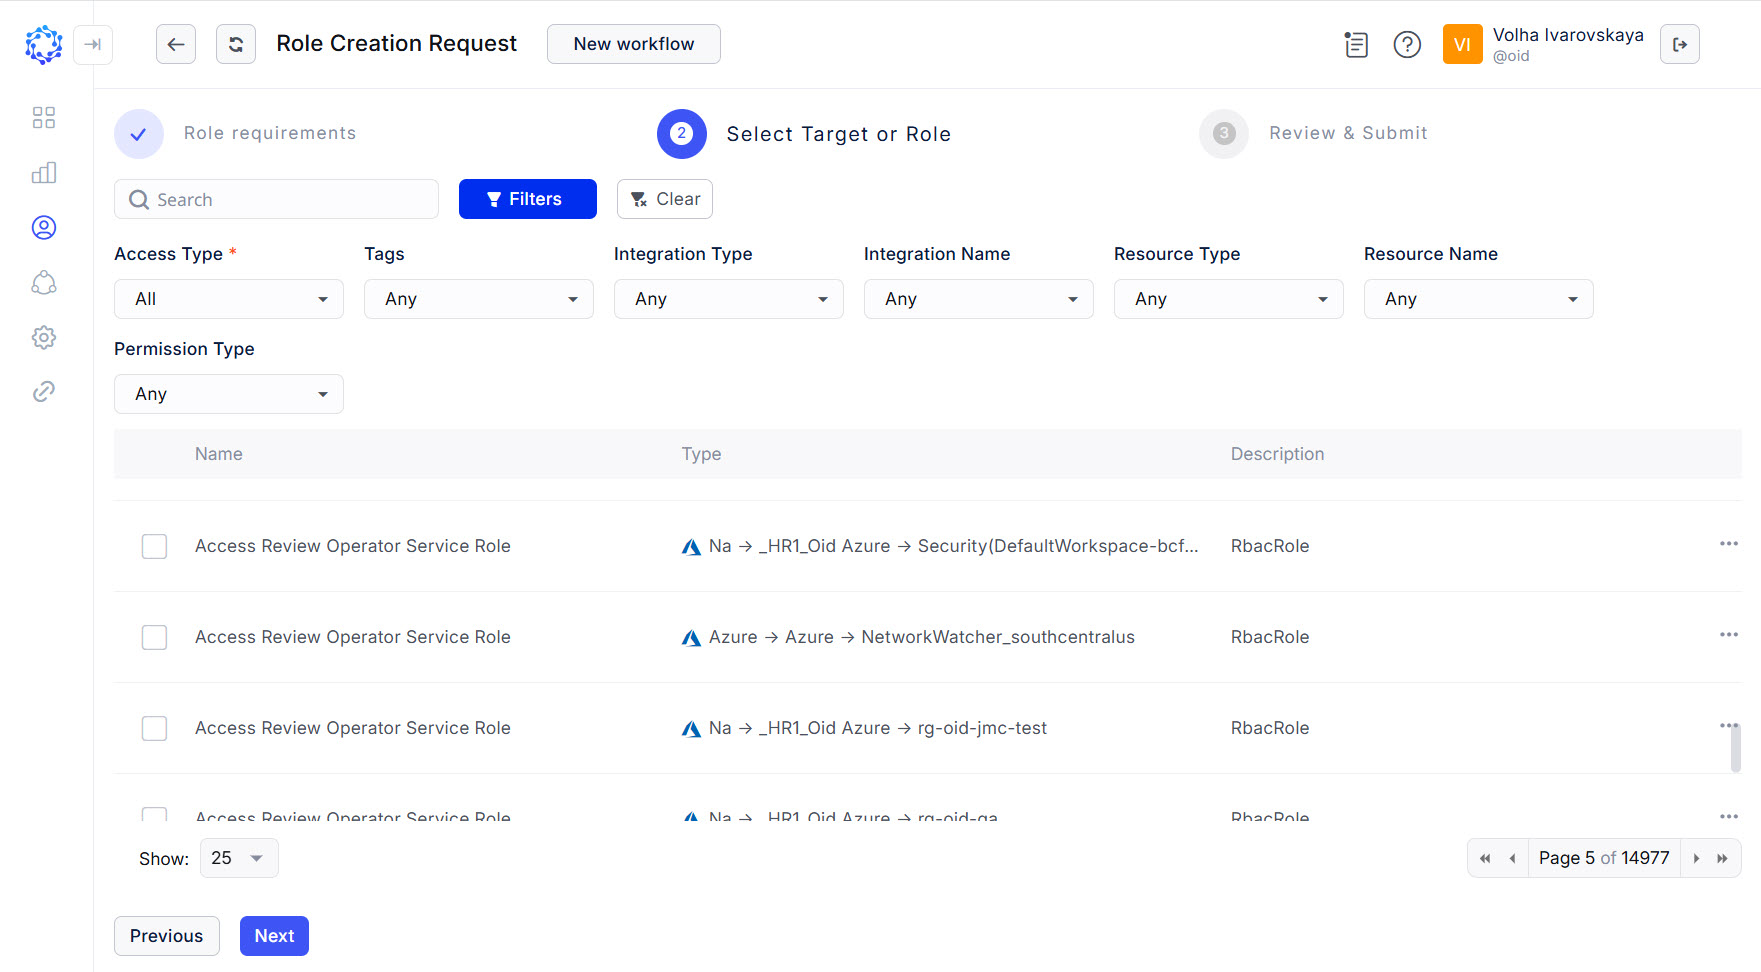
Determine what access is required by selecting permissions from the grid, and click Next to move to the next step.
NOTE: Please, note that the grid of Entitlements to select to include into a Role contains IT Roles. If an IT Role is selected in the grid among other Entitlements, then the new Role created with the current workflow will display it in the
Included IT Rolespart, and this will make up the hierarchy of Roles.There are search, paging and filtering capabilities to help in identifying the required permissions:
- with an entry in the search bar, textual matches will show up in the grid;
- with an entitlement selected on one page and moving to another page; the selection will preserve up to the review step, where it is possible to discard unneeded permissions;
- with entitlements selected for different integrations, the corresponding quantity of accounts will be offered with the ratio of one account per each identified target system;
- search results can be combined with filtering;
- click Filters to view the available criteria; click Clear to discard the filters.
Below is an overview of available filters:
-
Access Type makes the grid show atomic permissions, and\or IT Roles configured in ObserveID.
-
Integration Type makes the grid display only the permissions from the integrations of the selected Integration Types.
-
Integration Name makes the grid display only the permissions from the selected integrations.
-
Resource Type makes the grid display only the permissions aligned with the resources of the selected Resource Types.
-
Resource Name makes the grid display only the permissions aligned with the selected resources.
-
Permission Type makes the grid display only the permissions of the selected Permission Type.
-
Review the access per each Target and their corresponding selected permissions. If needed, click the bin icon to discard unnecessary ones, and when ready, click Submit to submit the role creation request and launch the workflow.
Once launched, the Role Creation Request workflow shows up in the Workflow grid among other workflows. Heed the status of the workflow. It changes with every stage that the workflow goes through. If necessary, click Refresh, and the status will be updated. The History page of the workflow presents the results of how the workflow is running, or finished, and can help troubleshooting.

In case of a new Birthright Role created, the Role Creation workflow also reviews the existing Identities, and if it determines that there are existing Identities eligible for the new Birthright Role, the Role Creation workflow performs the required provisioning of the new Birthright Role to the identified existing eligible Identities.